
This post contains affiliate links. As an Amazon Associate I earn from qualifying purchases.
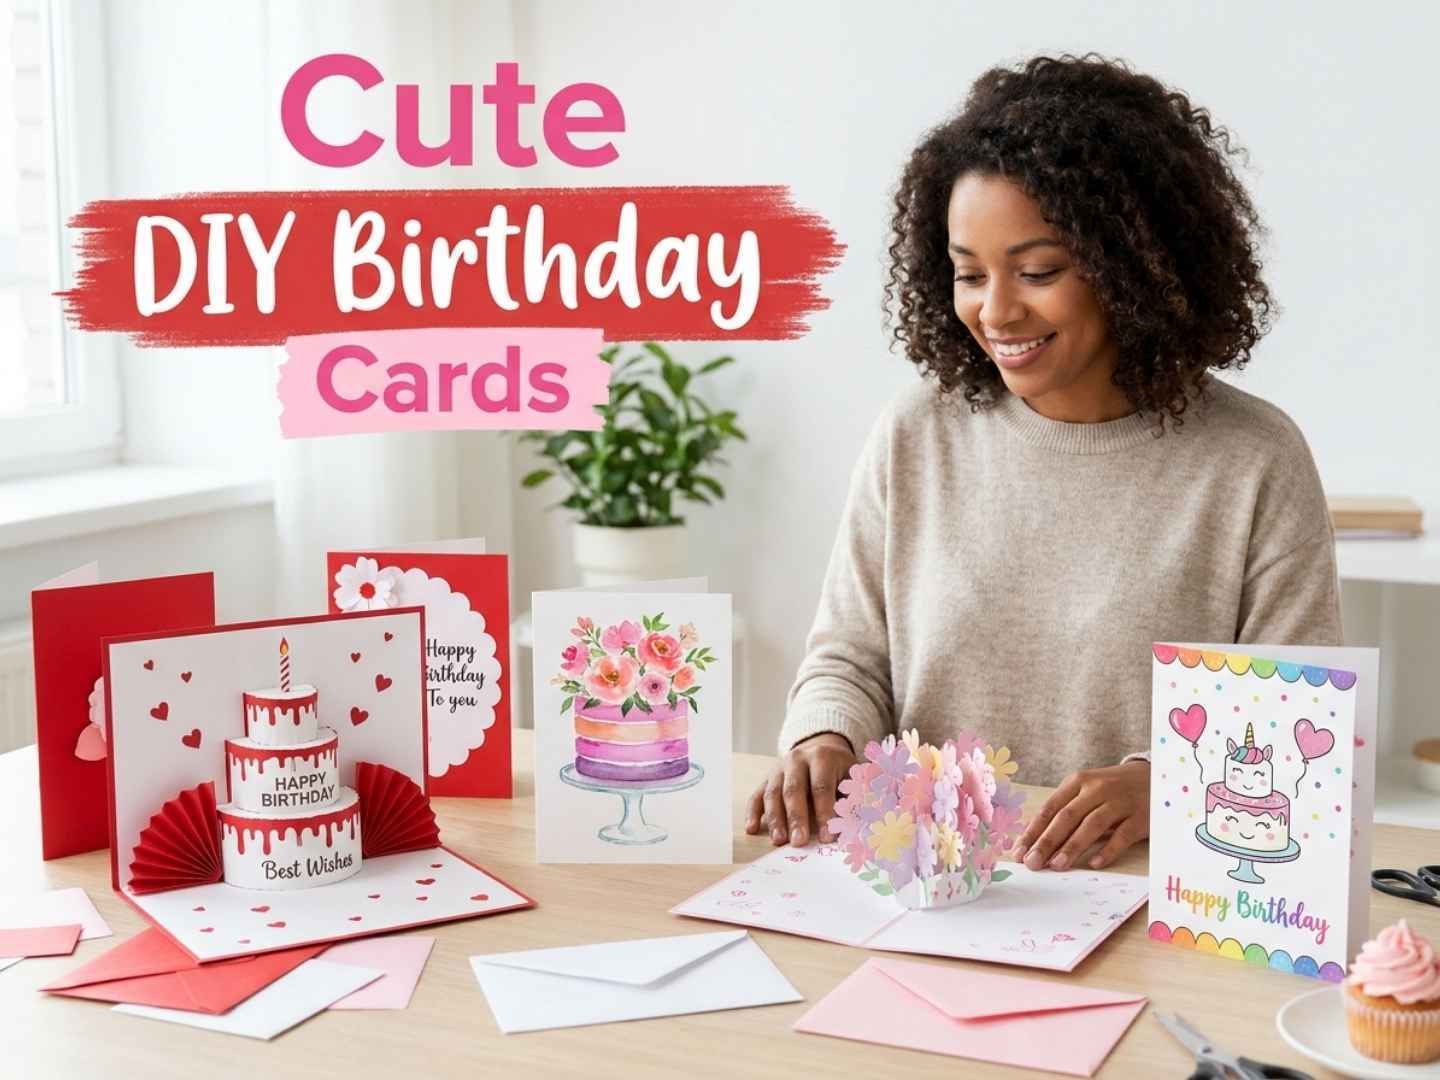
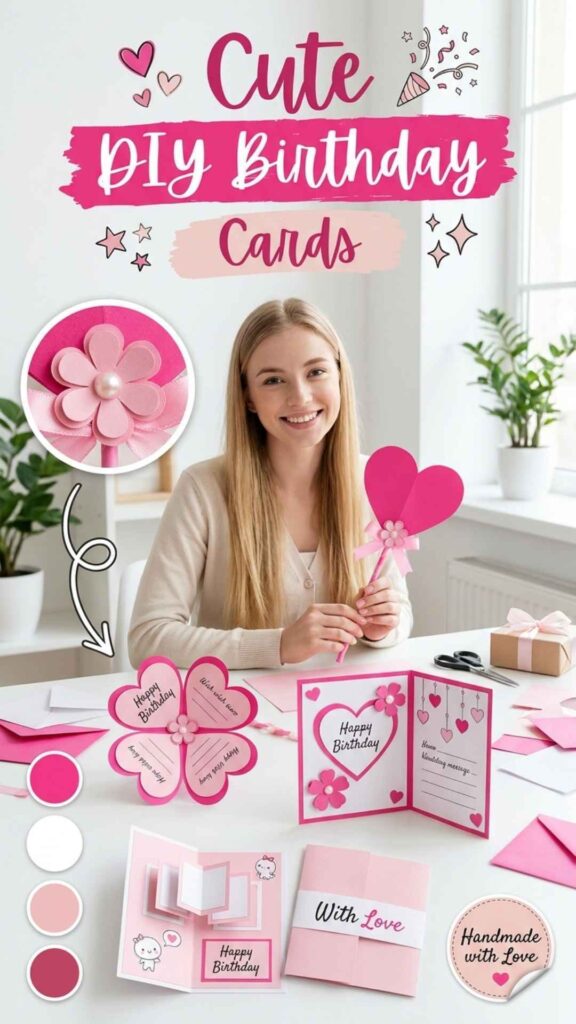
A handmade card says more than anything on the drugstore rack, and these cute diy birthday cards prove you don’t need fancy tools to make one. Every project here is built from colored paper, glue, pens or a little paint, and each one has a fun twist: a cake that pops up, petals that open into a message or a heart on a stick.
This collection rounds up 10 free video tutorials, each credited to the creator who made it. You’ll find 3D pop-ups like the DIY 3D Tiered Cake Pop-Up Card, fold-out designs like the DIY Blooming Petal Fold Message Card, simple flat cards with layered hearts, a hand-drawn unicorn cake kids can make and a watercolor cake for painters. Every project comes with two practical tips and a short supply list.
To choose, start with the person and your time. A pop-up or petal fold takes more cutting and folding but gets the biggest reaction when it’s opened. A drawn or layered flat card is quicker, mails easily and is a good first project. The comparison table near the end groups the cards by style so you can narrow it down quickly.
Quick List
- DIY 3D Tiered Cake Pop-Up Card
- DIY Smiling Heart Lollipop Birthday Card
- DIY Blue Fan-Fold Hanging Hearts Card
- DIY Pink Layered Frames Pop-Up Card
- DIY Watercolor Flower-Topped Cake Card
- DIY Pink Heart Gatefold Birthday Card
- DIY Red and Black Double Heart Card
- DIY Hand-Drawn Unicorn Cake Card
- DIY Blooming Petal Fold Message Card
- DIY Pastel Pop-Up Flower Bouquet Card
How to Match a Card Style to the Recipient
Think about who will open the card. Kids love movement and characters, so the DIY Hand-Drawn Unicorn Cake Card or the DIY Smiling Heart Lollipop Birthday Card are easy wins. For a best friend or sister, a pop-up with a hidden message, like the DIY Pink Layered Frames Pop-Up Card, feels personal and a little playful.
For partners, parents or anyone who prefers a cleaner look, go for bold contrast or soft painting. The DIY Red and Black Double Heart Card has a grown-up color palette, and the DIY Watercolor Flower-Topped Cake Card looks good enough to frame and keep on a shelf.
Color matters as much as the style. Pink and red say sweet and romantic, blue reads fresh and works well for boys and men, and pastels feel gentle and cheerful. If you know the person’s favorite color, swap it in. Nearly every design here works in any palette.
Paper, Glue and Tool Basics for Beginners
Most of these cards use plain colored paper or cardstock, white paper, scissors, a ruler, a pencil and glue. Thicker paper or cardstock holds pop-ups and fan folds better, while thinner color paper is easier to fold into petals. If a pop-up sags, back the base with a second sheet before adding the moving parts.
Use the right adhesive for each job. Double-sided tape or a glue stick works for flat layers and keeps the paper from wrinkling. Liquid glue is better for small pieces like pearls and paper flowers, and foam squares add depth to layered panels. Let glue dry before you test any fold or pop-up.
A bone folder or the back of a butter knife gives you crisp creases, which makes the biggest difference on accordion fans and pop-up steps. Beginners can start with a drawn or layered card, then try a simple flower pop-up, and work up to tiered cakes and stacked frames.
What to Write Inside and How to Mail Bulky Cards
Plan your message before you build, since pop-ups and fans take up a lot of space inside. Short lines work best: a greeting, one specific memory or compliment, a wish for the year ahead and your name. Petal and heart designs let you split the message into small parts, one per section.
Write in pencil first if you’re nervous, then trace over it with a fine pen. A white marker works on black or dark paper, and gel pens show up well on pastels. Let the ink dry fully before closing the card.
Pop-up, fan-fold and petal cards are thicker than a flat card, so measure the closed card and pick an envelope with some extra room. For very bulky or lumpy cards, use a padded envelope or a small gift box. Rigid or uneven envelopes can need extra postage, so check with the post office before mailing.
1. DIY 3D Tiered Cake Pop-Up Card
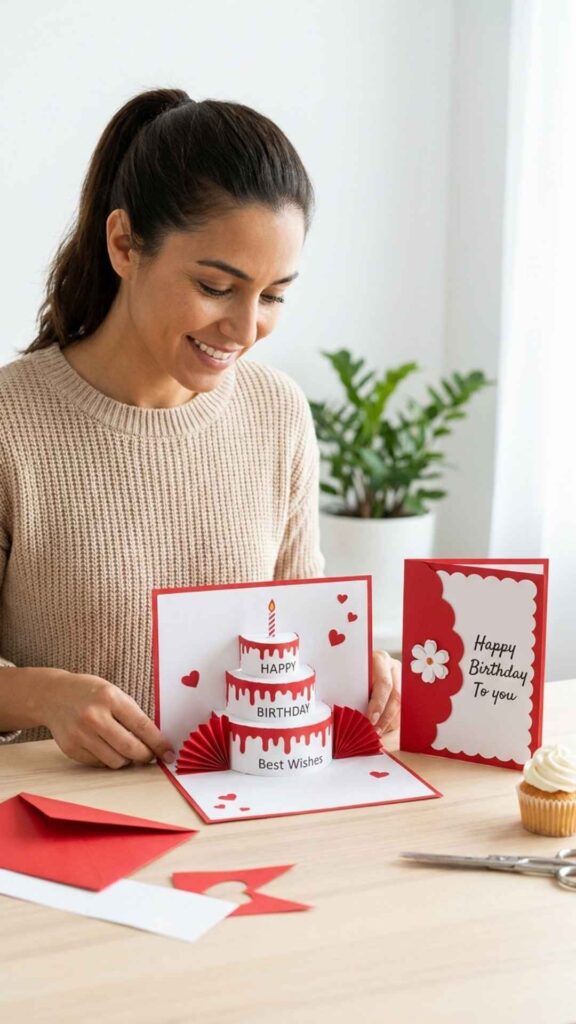
This red-and-white card opens to a three-tier birthday cake with a single candle on top that pops forward between pleated red fans on both sides. Crafts And Kutir’s tutorial puts ‘Happy Birthday’ and ‘Best Wishes’ right on the cake tiers and adds a dripping-frosting edge and scattered hearts. On the front, a white scalloped panel holds a small paper flower and ‘Happy Birthday To you’ handwritten in the center.
Fold the Fan Sides Before Gluing
Crease the red accordion strips all the way before you attach them, so the pleats open evenly with the card. Glue only the outer pleats to the card base and leave the middle free to flex. Open and close the card a few times to test it before you add the cake.
Write Messages Around the Cake
The cake takes up the center, so plan your note for the space beside or below it. A short line on each tier or a few words on the cover panel will read better than a long paragraph squeezed between the fans. Use a fine black pen so your writing matches the cake labels.
🎉 Supplies for the DIY 3D Tiered Cake Pop-Up Card
Creator Credit: Crafts And Kutir
2. DIY Smiling Heart Lollipop Birthday Card
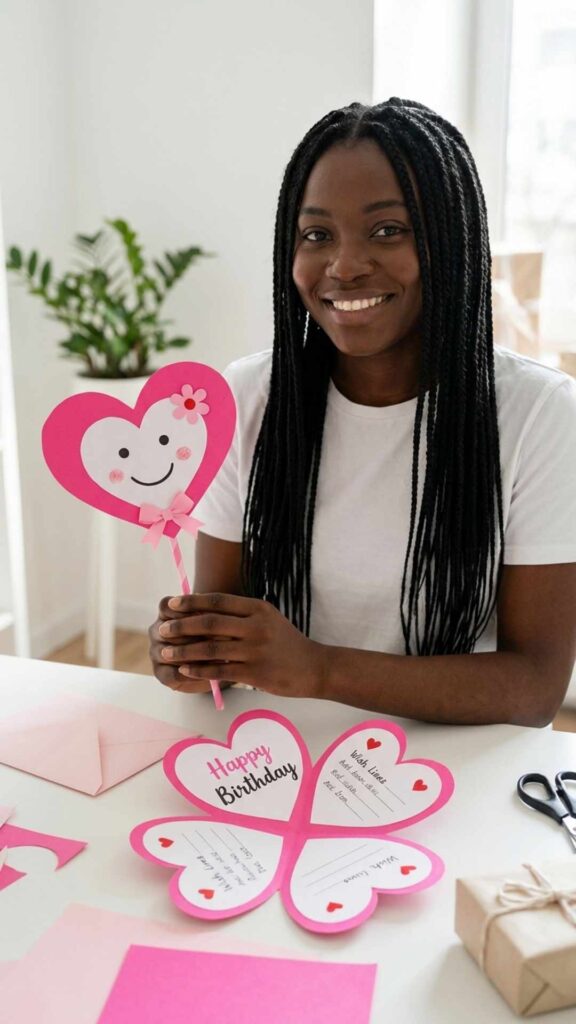
This card is a pink heart on a stick, with a smiling face, rosy cheeks, a paper flower and a little bow on the handle. Crafts And Kutir shows how it opens into four heart-shaped petals, with ‘Happy Birthday’ and handwritten wishes spread across them. It’s a playful, kid-friendly design that feels more like a small gift than a flat card.
Trace One Heart Template for Petals
Cut one heart template and trace it for every petal so all four line up when the card is folded closed. To get the white border, mount each pink heart on a white heart cut slightly larger. Make sure the petals fold neatly over the center before you start writing.
Spread Your Message Across Petals
Give each petal one part of your message: a greeting, a memory, a wish and your sign-off. Write along the curve of the heart so the words follow its shape. Small hearts drawn between the lines fill gaps and match the front.
🎉 Supplies for the DIY Smiling Heart Lollipop Birthday Card
Creator Credit: Crafts And Kutir
3. DIY Blue Fan-Fold Hanging Hearts Card
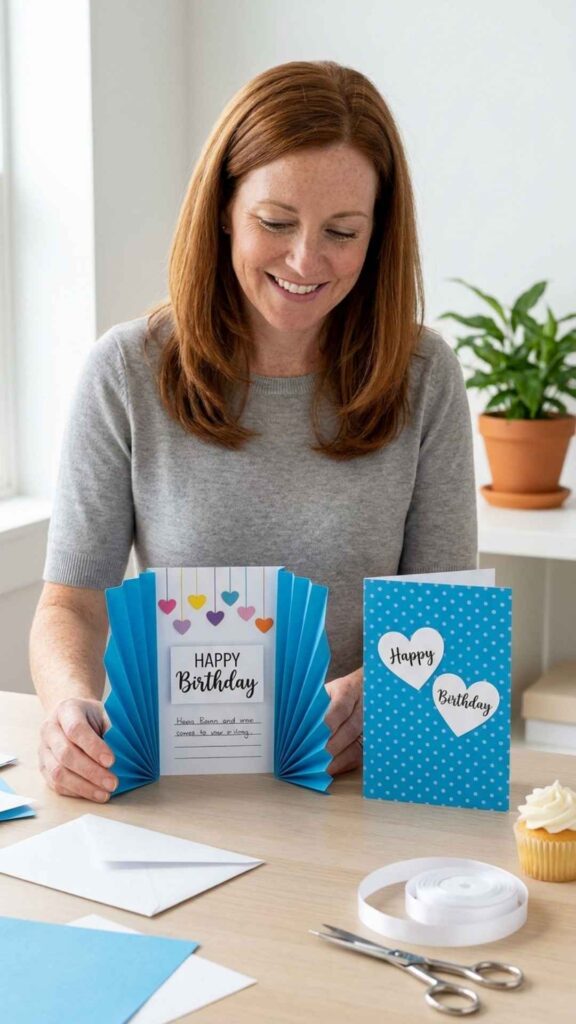
The blue polka-dot cover has two white hearts that read ‘Happy’ and ‘Birthday’. Inside are pleated blue fans and a row of tiny hearts hanging on strings above a ‘HAPPY Birthday’ block. Shrishti : The Craft Lover builds it with blue and white color paper, glue, sketch pens and satin ribbon, and the cool blue makes a fresh change from pink birthday cards.
Hang the Hearts at Varied Heights
Draw the strings with a sketch pen at different lengths so the little hearts look like a garland rather than a straight line. Glue a paper heart to the end of each string and keep them clear of the fold. Hearts in a few different colors stand out against the blue.
Add Ribbon Before Closing Up
If you use the satin ribbon as a tie or accent, attach it before you glue the last layer so the ends stay hidden. A ribbon tie also holds the fans closed in the envelope. The pleats add bulk, so pick a padded or larger envelope.
🎉 Supplies for the DIY Blue Fan-Fold Hanging Hearts Card
Creator Credit: Shrishti : The Craft Lover
4. DIY Pink Layered Frames Pop-Up Card
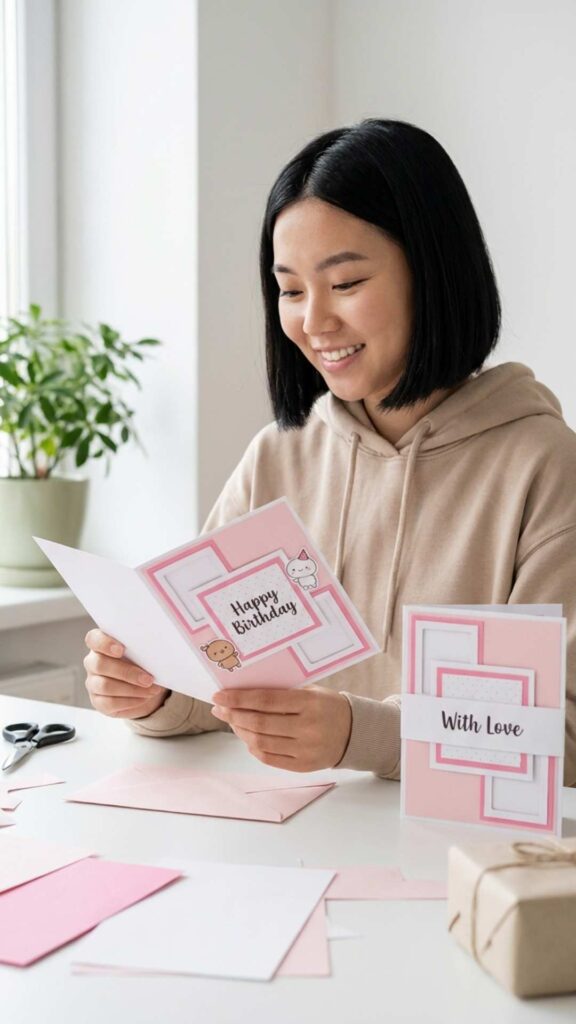
A ‘With Love’ band wraps the soft pink and white cover. Inside, stacked square frames pop forward like a tunnel, with little character drawings and a pink ‘Happy Birthday’ panel beside them. Victoria Crafts shows the pop-up step by step in a short tutorial, and the pastel colors and doodles give it a cute, gift-like feel for a best friend.
Cut Each Frame Slightly Smaller
Cut each square frame a little smaller than the one before it to get the stepped tunnel look. Keep the borders the same width so it looks tidy. Lay the frames out in order before gluing so you don’t mix up the sizes.
Use the Band as a Closure
The ‘With Love’ band also keeps the card closed, so make it snug enough to hold without crushing the pop-up. Glue only one end to the back so it slides on and off. You can change the words to the recipient’s name.
🎉 Supplies for the DIY Pink Layered Frames Pop-Up Card
Creator Credit: Victoria Crafts
5. DIY Watercolor Flower-Topped Cake Card
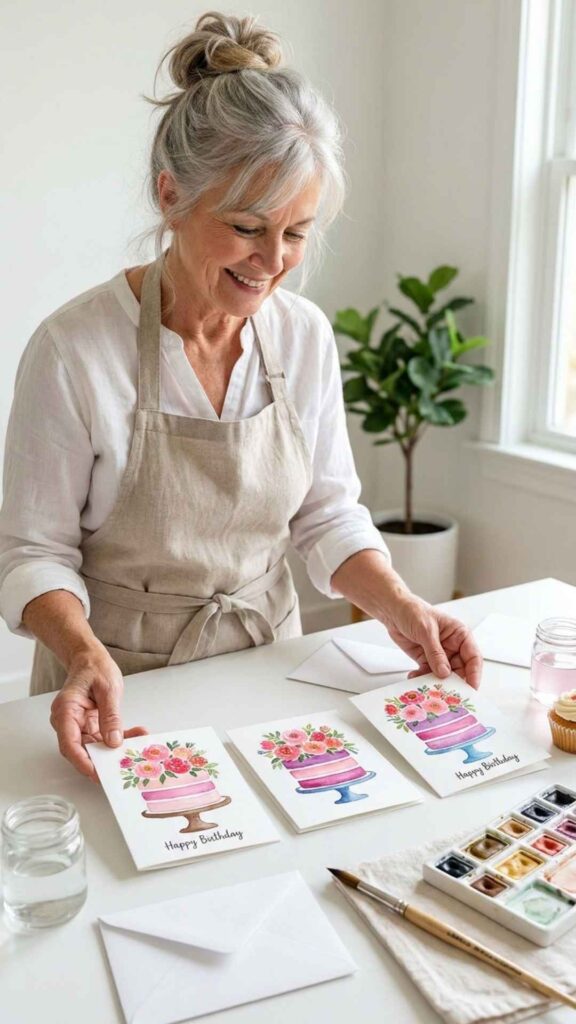
Each card has a painted layer cake on a stand, striped in pink, magenta and purple and topped with a loose bouquet of watercolor flowers and leaves. Love Letters to Milo’s tutorial covers the cake, the flower topper, the leaves and the final sparkle touches. Hand-lettered ‘Happy Birthday’ under the cake finishes a card that’s good enough to frame.
Let Each Cake Layer Dry
Paint every other stripe and let it dry before you fill the gaps, so the colors stay crisp instead of bleeding together. Go from light pink up to deep purple for the ombre effect. A hair dryer on low speeds up the drying.
Paint Several Cards at Once
Like the three versions shown, paint a few cakes side by side and change up the flowers and stand colors. That way you’ll have spare birthday cards ready for the year. Add the greeting last so you can match it to each person.
🎉 Supplies for the DIY Watercolor Flower-Topped Cake Card
Creator Credit: Love Letters to Milo
6. DIY Pink Heart Gatefold Birthday Card
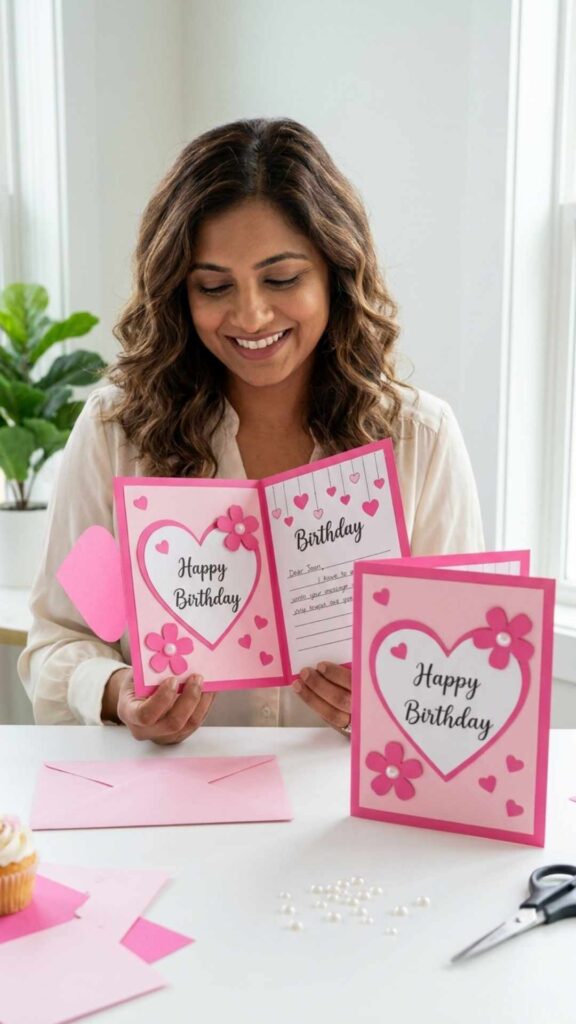
A white heart that reads ‘Happy Birthday’ sits across the center of this pink and white card. Pink paper flowers with pearl centers and tiny pink hearts decorate the front. When it opens, Shrishti : The Craft Lover’s card shows hanging hearts and a written birthday message, and it’s quick to make with basic paper.
Attach the Heart to One Flap
Glue the center heart to one side only so the card can still open. Line it up while the card is closed so it sits centered over the opening. Press it down firmly and let it dry before you test the flap.
Add Pearls to Flower Centers
A small pearl or gem in the middle makes simple five-petal paper flowers look finished. Place them with a dot of liquid glue and tweezers. Keep the decorations flat enough to fit a standard envelope.
🎉 Supplies for the DIY Pink Heart Gatefold Birthday Card
Creator Credit: Shrishti : The Craft Lover
7. DIY Red and Black Double Heart Card
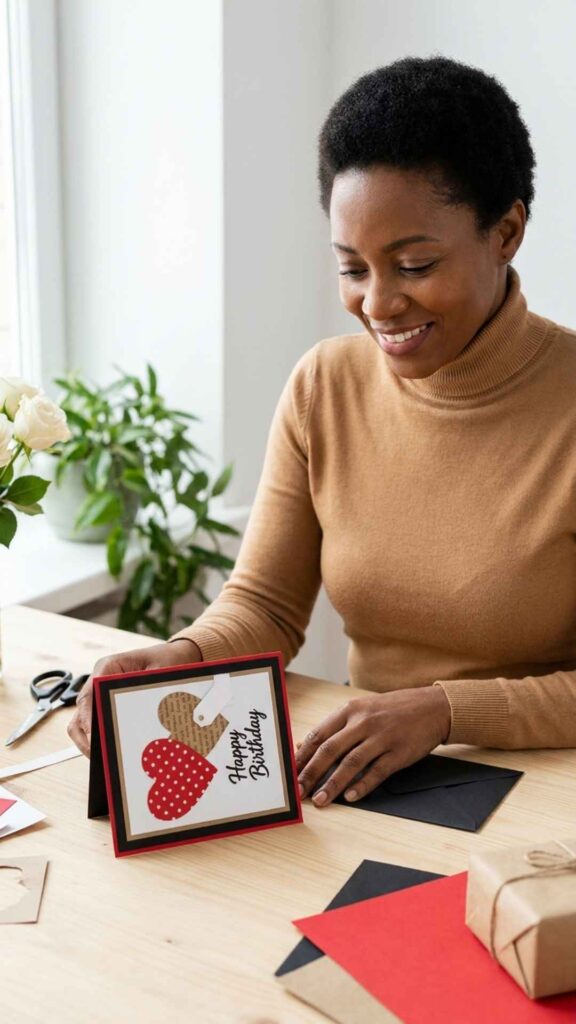
A white panel sits on a black base with a thin red edge, topped with a red polka-dot heart overlapping a kraft heart and a ‘Happy Birthday’ sentiment in script. Handmade cards ideas makes it from red, white and black cardstock, kraft paper, ribbon and a white marker. The bold colors make it a good choice for a partner, a teen or anyone who prefers a less sugary card.
Layer Contrasting Mats for Depth
Cut each layer a little smaller than the one under it so a thin border of red and black shows around the white panel. Glue the edges and corners firmly so nothing lifts. Measure with a ruler before cutting to keep the borders even.
Use White Marker on Black
Use the white marker to write on the black base or any black inside panel. Let it dry completely before you close the card so it doesn’t smudge. A short, neatly written message suits this cleaner style.
🎉 Supplies for the DIY Red and Black Double Heart Card
Creator Credit: Handmade cards ideas
8. DIY Hand-Drawn Unicorn Cake Card
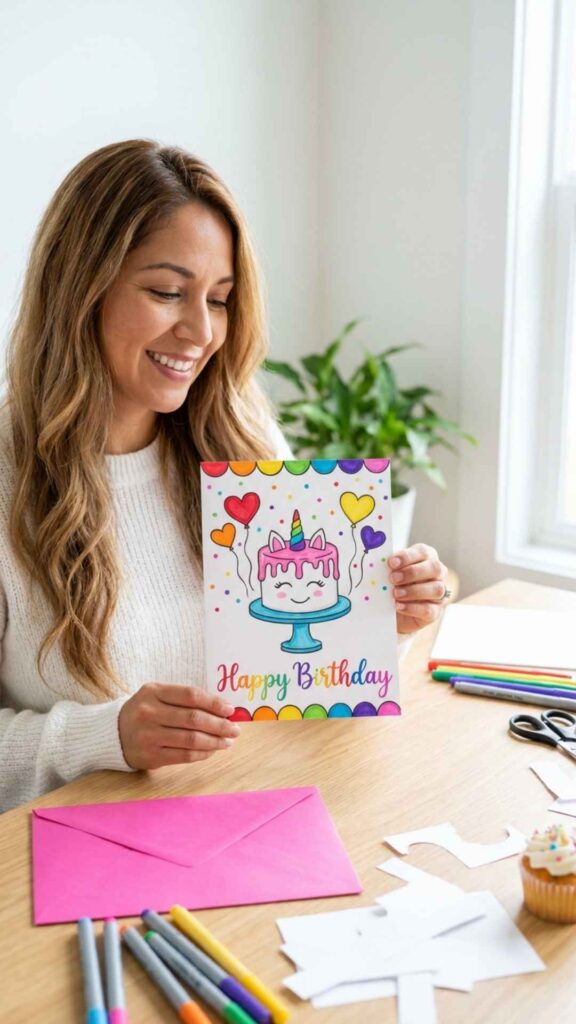
A smiling unicorn cake with a horn, ears and frosting sits in the middle of this white card, surrounded by heart balloons, confetti dots and a rainbow scalloped border. Shilpa Drawing & Craft makes it with just a white sheet, scissors and sketch pens. Colorful ‘Happy Birthday’ script underneath makes it a fun card for kids to draw themselves.
Draw the Scalloped Border First
Sketch the scallops lightly in pencil around the edge, then color them in rainbow order. Drawing the border first helps you center the cake and lettering inside it. Wait until the ink is dry before erasing the pencil lines.
Let Kids Customize the Cake
Since the whole card is drawn, kids can easily swap the unicorn for a favorite animal or add the birthday age to the cake. Have them practice the ‘Happy Birthday’ lettering on scrap paper first. Fold the sheet before drawing so the design ends up on the front.
🎉 Supplies for the DIY Hand-Drawn Unicorn Cake Card
Creator Credit: Shilpa Drawing & Craft
9. DIY Blooming Petal Fold Message Card
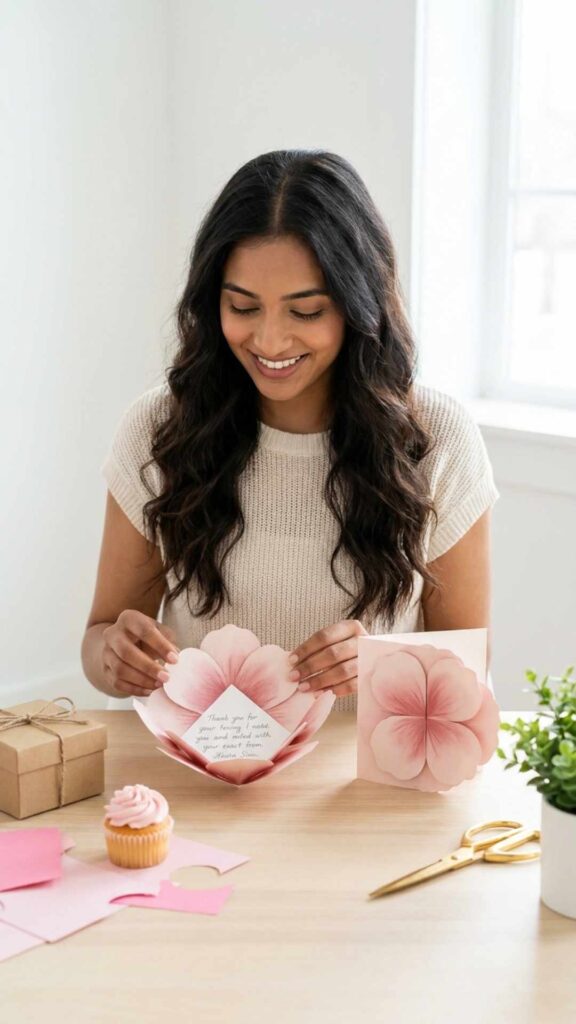
Folded shut, this card looks like a single pink-tinted flower, and each petal opens to reveal a handwritten note in the center. Gayatri’s Crafts shows how to cut and fold the petals, shape them so they look real and write your message inside. The slow ‘blooming’ reveal makes it a birthday surprise people remember.
Fold Petals in the Same Order
Number the petals lightly in pencil on the back so you always fold them closed in the same order. That keeps the flower shape neat every time the card is reopened. Crease gently so the petals look soft rather than sharp.
Write the Note Before Folding
Write your message on the center piece before you attach the petals, so your hand doesn’t crumple them. A few heartfelt lines that fit the visible area work best. Mail it in a small box or padded envelope to protect the petals.
🎉 Supplies for the DIY Blooming Petal Fold Message Card
Creator Credit: Gayatri’s Crafts
10. DIY Pastel Pop-Up Flower Bouquet Card
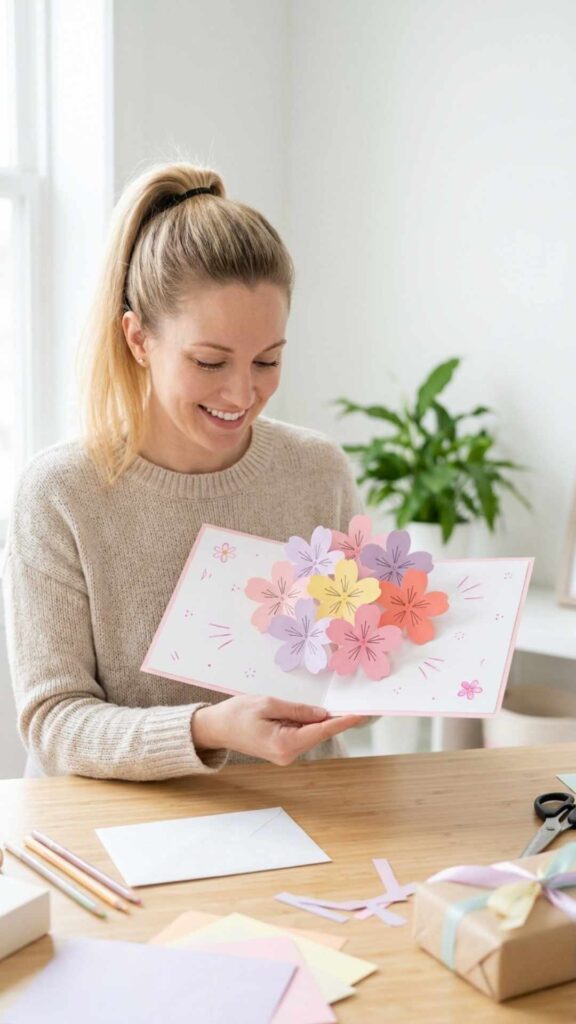
When you open this white card, a cluster of pastel pink, purple and yellow paper flowers pops up from the center fold, with small doodles and a tiny drawn flower around it. Artbygriii’s short tutorial is made for beginners and works for birthdays as well as other occasions. The soft colors and simple petal shapes keep it cheerful and easy to finish in one sitting.
Stack Flowers Along the Fold
Glue the flowers so they overlap across the center crease, which makes them rise together as the card opens. After each flower, close and reopen the card to check that nothing catches. Draw petal lines on each flower before gluing it in.
Doodle Around the Pop-Up
Fill the empty space inside with simple doodles, dots or a small drawn flower like the ones shown. Leave room on the lower half for your birthday message. Colored pens in the same pastel shades as the flowers tie it together.
🎉 Supplies for the DIY Pastel Pop-Up Flower Bouquet Card
Creator Credit: Artbygriii
Which Card Style Fits Your Celebration?
| Style direction | Projects to compare | Main feature | Check before choosing |
|---|---|---|---|
| Fan-fold showpieces | 1, 3 | Pleated side fans frame a pop-up center | Needs a larger envelope because the fans add bulk |
| Pop-up frames and flowers | 4, 10 | Layers that lift off the page when opened | Glue placement along the fold must be precise |
| Petal and heart folds | 2, 9 | Fold-out shapes that reveal a hidden message | Plan your message before attaching the petals |
| Layered heart fronts | 6, 7 | Flat layers with hearts and a clear sentiment | Keep embellishments flat enough for mailing |
| Drawn and painted designs | 5, 8 | Artwork made with pens or watercolor | Requires drawing or painting time and drying time |
Conclusion
Whether you want a showstopper or a quick weeknight project, there’s a card here for every birthday on your list. The DIY 3D Tiered Cake Pop-Up Card and the DIY Blue Fan-Fold Hanging Hearts Card make a big entrance, while the DIY Blooming Petal Fold Message Card turns your note into the surprise.
If you’re short on time or crafting with kids, start with the DIY Hand-Drawn Unicorn Cake Card or the DIY Pastel Pop-Up Flower Bouquet Card, and save the DIY Watercolor Flower-Topped Cake Card for a relaxed afternoon of painting. Pick one, gather your supplies and follow the creator’s video step by step.
Frequently Asked Questions
How do you make a cute birthday card at home?
Start with a folded sheet of colored paper or cardstock and add one focal point, such as a pop-up cake, a heart or a drawn character. Add a clear ‘Happy Birthday’ sentiment and a few small details like hearts, dots or paper flowers. Following a video tutorial step by step is the easiest way to get clean results the first time.
What supplies do I need for DIY birthday cards?
Most cards need colored paper or cardstock, scissors, a ruler, a pencil, glue or double-sided tape and pens or markers. Pop-up and fan-fold cards benefit from a scoring tool for crisp creases. Extras like pearls, ribbon, paper punches or watercolor paints are optional and depend on the design.
What is the easiest DIY birthday card for beginners?
A flat drawn or layered card is the easiest place to start, because there are no moving parts. A simple pop-up flower card is a good next step since it uses just a few pieces glued along the center fold. Save tiered pop-ups and stacked frames for when you feel comfortable with cutting and scoring.
How do you make a pop-up birthday card?
Fold the card base in half, then cut and fold tabs or steps that push forward when the card opens. Glue your pop-up pieces, such as a cake or flowers, onto those tabs or across the center crease. Test the open and close motion after each piece so nothing catches or tears.
What should I write inside a handmade birthday card?
Keep it short and personal: a greeting, one specific memory or compliment, a wish for the year ahead and your name. Plan the space before you build, since pop-ups take up room inside. Writing in pencil first and tracing over it with a fine pen helps avoid mistakes.
Can you mail a pop-up or 3D birthday card?
Yes, but measure the card when closed and use an envelope with extra room, or a padded envelope or small box for bulky designs. Make sure every moving part folds flat before sealing. Rigid or lumpy envelopes may need extra postage, so check at the post office before sending.