
This post contains affiliate links. As an Amazon Associate I earn from qualifying purchases.
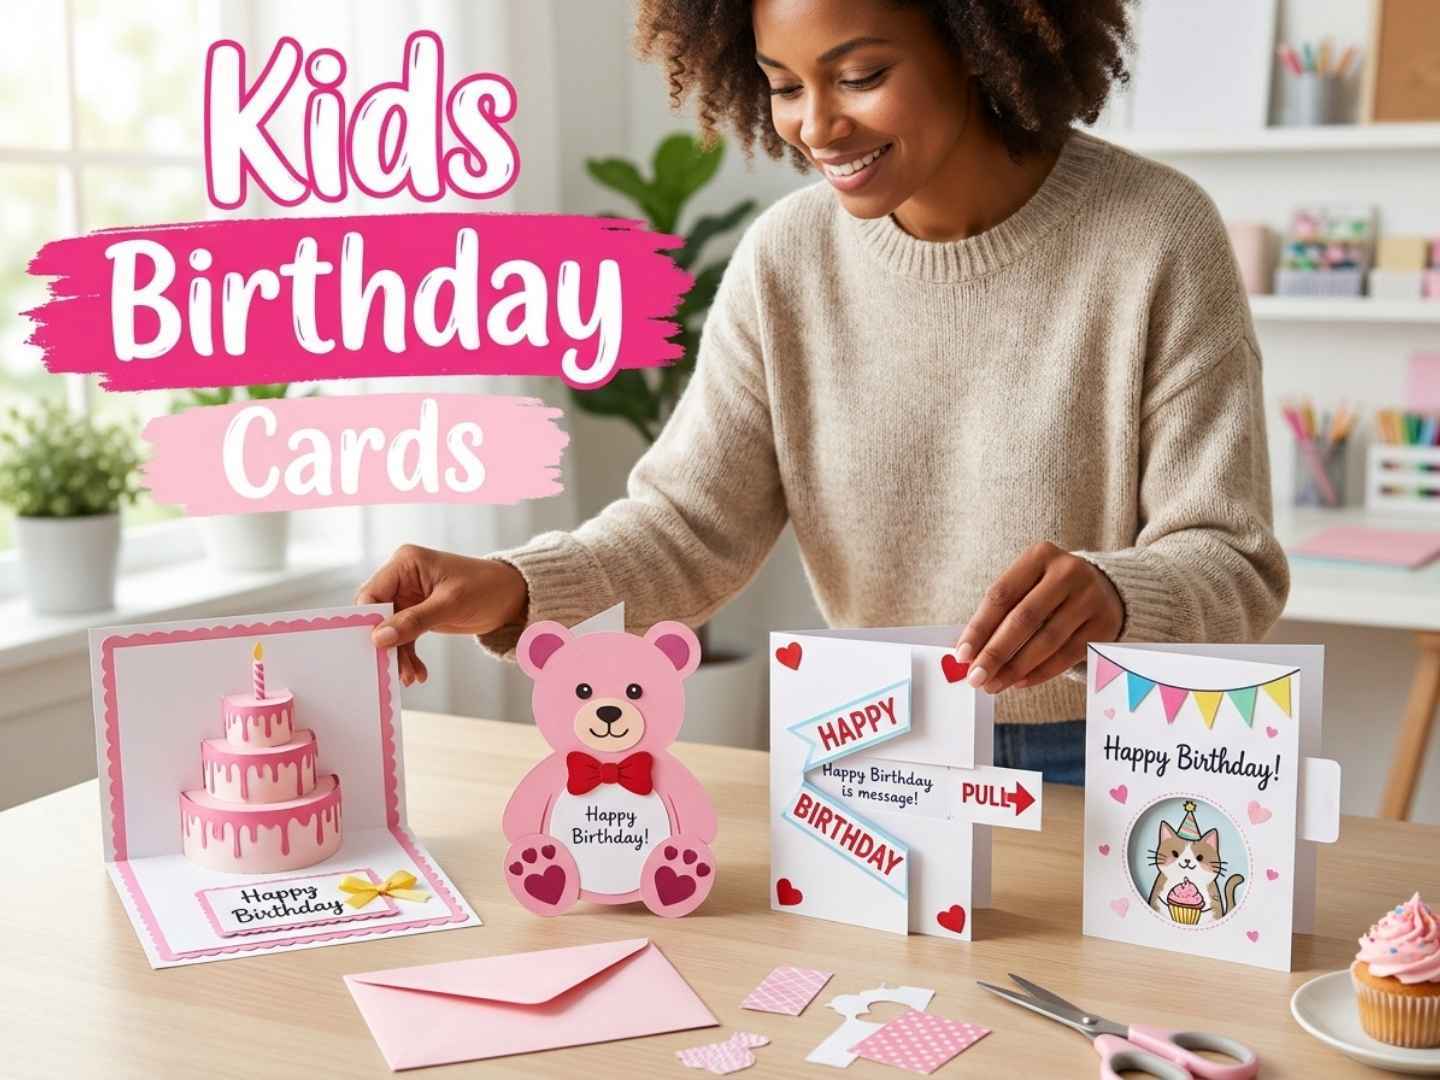
A store-bought card gets a quick look before the presents. Handmade kids birthday cards are different. A cake that pops up, a teddy bear with heart paws, or a tab that says PULL gets opened again and again, and often ends up on the fridge. Better still, most of these designs are simple enough for kids to help make.
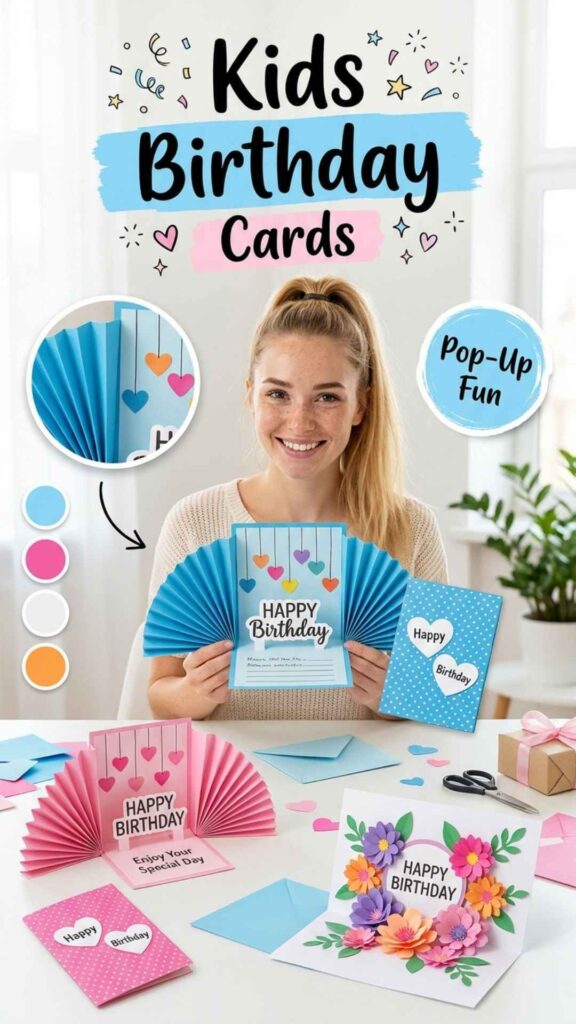
This collection brings together 20 free video tutorials, each credited to the creator who made it. You’ll find pop-up cakes, accordion fan cards, shaped cards, heart window gatefolds, watercolor paintings and drawing-only doodle cards. For each one we describe what makes it different, share two practical tips and list three supplies so you can gather everything before you press play.
To pick one, start with the birthday kid and your time. Younger children love a moving part or a card shaped like an animal. Older kids may like a painted card made just for them. If you have a free afternoon, try a pop-up or accordion fold. If the party is tomorrow, a drawn or painted card with one strong picture will be ready in time.
Quick List
- DIY Pop-Up Pink Layer Cake Card
- DIY Watercolor Hap-Bee Birthday Card
- DIY Heart Lollipop Flower Fold Card
- DIY Blue Accordion Pop-Up Heart Card
- DIY Pink Heart Gatefold Birthday Card
- DIY Pink Teddy Bear Shape Card
- DIY Pink Fan Fold Pop-Up Card
- DIY White Paper Pop-Up Cake Card
- DIY Watercolor Cherry Cupcake Card
- DIY Watercolor Balloon and Candle Cards
- DIY Heart Window Flap Birthday Card
- DIY Hand-Drawn Party Doodle Card
- DIY Eight Easy White Paper Cards
- DIY Hanging Hearts Circle Doodle Card
- DIY 3D Paper Flower Pop-Up Card
- DIY Pastel Blossom Pop-Up Card
- DIY Pull-Tab Surprise Birthday Card
- DIY Machine-Cut Floral Wreath Card
- DIY Watercolor Rainbow Candles Card
- DIY Party Cat Pop-Up Birthday Card
How to Choose the Right Card for the Birthday Kid
Pick a card style that fits the child’s age. Toddlers and preschoolers react most to things they can see and touch: a card shaped like a teddy bear, a cake that pops up, or a tab to pull. School-age kids also enjoy those, and they notice personal details too, such as their name on a sign, their favorite animal, or the right number of candles. Tweens often prefer a cleaner painted design, like a watercolor bee or a row of rainbow candles.
Then be honest about your skill level and time. Drawn and painted cards are the most forgiving. If a line goes wrong, it becomes part of the doodle. Shaped and gatefold cards add careful cutting. Pop-ups and accordion fans need accurate measuring and folding, so allow an extra hour the first time and make a practice version from scrap paper.
If the birthday kid will be making the card, choose a design with one hard step an adult can do. Then hand the rest to the child. An adult cuts the pop-up slits or heart window, and the child colors, draws confetti, glues on flowers and writes the message. The card still looks neat, and the child can say they made it.
Paper, Glue and Tools: What You Actually Need
For most cards here, plain cardstock is the best base because it holds a fold and stands up when opened. Regular printer paper works for the drawing-only and pull-tab designs, and several tutorials use nothing else. For watercolor, use real watercolor paper or blank watercolor cards. Ordinary paper buckles and pills as soon as it gets wet.
Match the adhesive to the job. A glue stick is easiest for kids and works for flat paper pieces. Double-sided tape gives cleaner edges and no drying time on layered panels. Liquid craft glue holds better where something needs to stay put, such as accordion fans. Foam squares lift a piece off the background for a bit of depth.
You need only a few tools: sharp scissors, a ruler, a pencil and eraser, and something to score folds with. A bone folder or the back of a butter knife run along a ruler gives crisp creases, which matters most for pop-ups and fan folds. For coloring, markers give bright, even color on white paper, and fine black pens add outlines that make everything look finished.
What to Write Inside and How to Mail Bulky Cards
Keep the message short and personal. Kids read birthday cards out loud, so a line about something they love, a joke that matches the design, or a memory from the past year goes over better than a long paragraph. Write the child’s name and new age somewhere visible. Many parents keep handmade cards for years, so adding the date also helps.
Plan the inside layout before you decorate. Pop-up cards often leave only a strip of space under the moving part. Fold-out designs like the heart flower card give you several small panels, one for each wish. Pencil light guide lines first, then write in a fine pen once any paint is completely dry.
Pop-ups, paper flowers and shaped cards are thicker than a flat card. Measure the closed card and choose an envelope a little larger on every side. Use a padded mailer or a small flat box for anything with curled petals, pearls or foam layers. At the post office, ask whether the thickness needs extra postage, since rigid or uneven mail can cost more than a standard letter.
1. DIY Pop-Up Pink Layer Cake Card
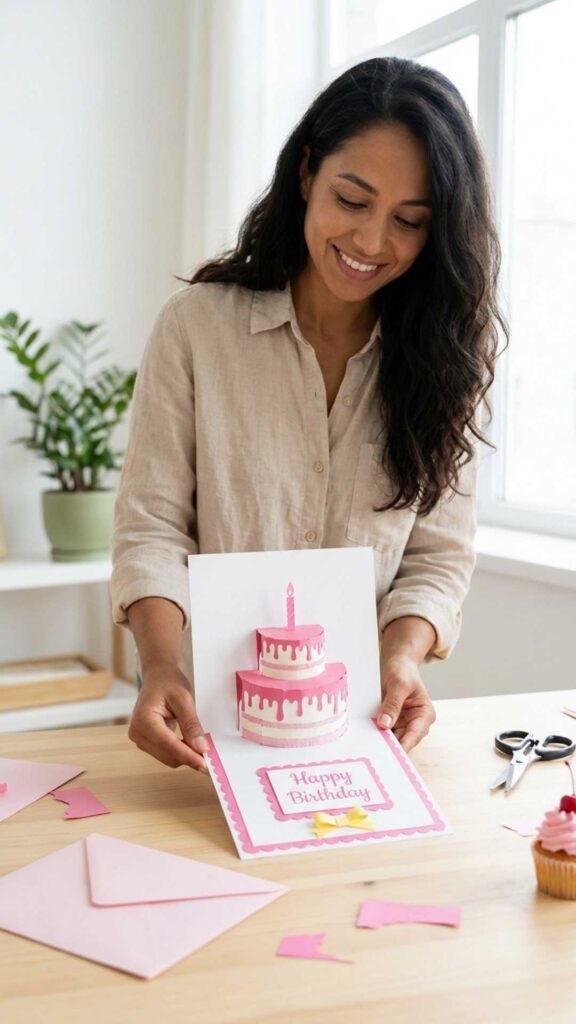
When this card opens, a tiered pink cake with dripping frosting and a single candle stands up from the center fold. DG Handmade’s tutorial finishes the white base with a scalloped pink border, a ‘Happy Birthday’ panel and a little yellow bow, with sparkly candy details on the cake. A cake that rises off the page is an easy win for a child’s party.
Crease the pop-up tabs before gluing
Fold and unfold every pop-up tab a few times before you attach the cake layers. Sharp creases help the cake stand up straight and fold flat again without tearing. Check that the card still closes after you glue each layer, before you add the next.
Count the candles to match their age
The design shows one candle, but you can add a paper candle for each year. Put the child’s name on the ‘Happy Birthday’ panel so the card works as a keepsake. Keep sparkly toppings flat so the card still closes.
🎉 Supplies for the DIY Pop-Up Pink Layer Cake Card
Creator Credit: DG Handmade
2. DIY Watercolor Hap-Bee Birthday Card
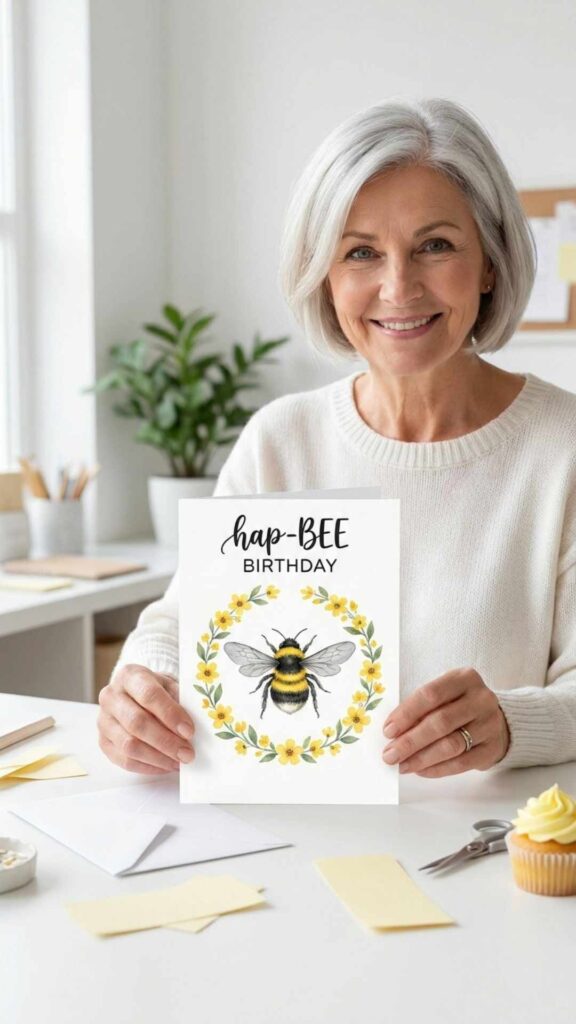
A fuzzy watercolor bumblebee sits inside a ring of small yellow flowers and green leaves, with the pun ‘hap-BEE BIRTHDAY’ lettered across the top. Julia Lis Art paints it in real time, so beginners can follow each layer of the bee’s body and wings. Kids who love bugs, gardens or wordplay will enjoy the pun.
Let each stripe dry before the next
Paint the yellow and dark stripes of the bee’s body in separate passes. If the paint is still wet, the colors will bleed into a muddy blob. A slightly damp brush lifts out highlights to make the body look fuzzy.
Carry the bee pun inside
Write a matching line inside, such as ‘Bee-lieve in yourself’ or ‘You’re the bee’s knees.’ Kids enjoy reading the jokes out loud. Add a tiny painted bee next to the message so the inside matches the front.
🎉 Supplies for the DIY Watercolor Hap-Bee Birthday Card
Creator Credit: Julia Lis Art
3. DIY Heart Lollipop Flower Fold Card
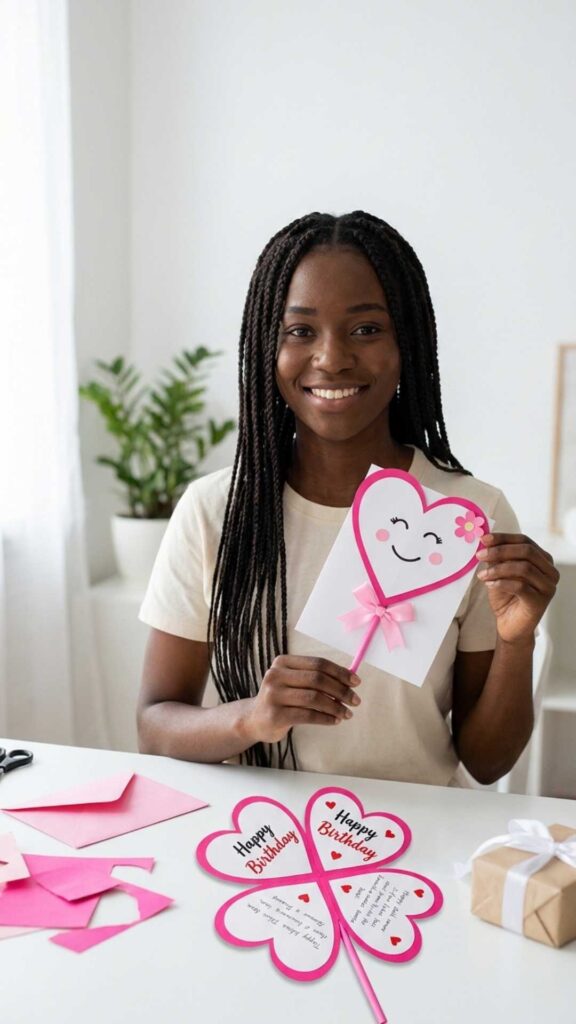
The card starts as one pink-edged heart on a stick with a smiling face and a little flower on top. It then unfolds into four hearts arranged like a flower, with room for ‘Happy Birthday’ and a handwritten message. Crafts And Kutir builds it from colored and white paper, glue and tape, and kids love unfolding it to find the hidden message.
Trace one heart template for all four
Cut one heart pattern and trace it for all four petals so they line up when the card opens. Uneven hearts make the folded shape look lopsided. Glue the white heart onto the pink heart before you join the petals.
Write one wish per heart
Each of the four hearts has room for a short note. Try ‘Happy Birthday’ on one and a wish, a joke and the date on the others. Use a fine pen so the writing fits inside the curved edges.
🎉 Supplies for the DIY Heart Lollipop Flower Fold Card
Creator Credit: Crafts And Kutir
4. DIY Blue Accordion Pop-Up Heart Card
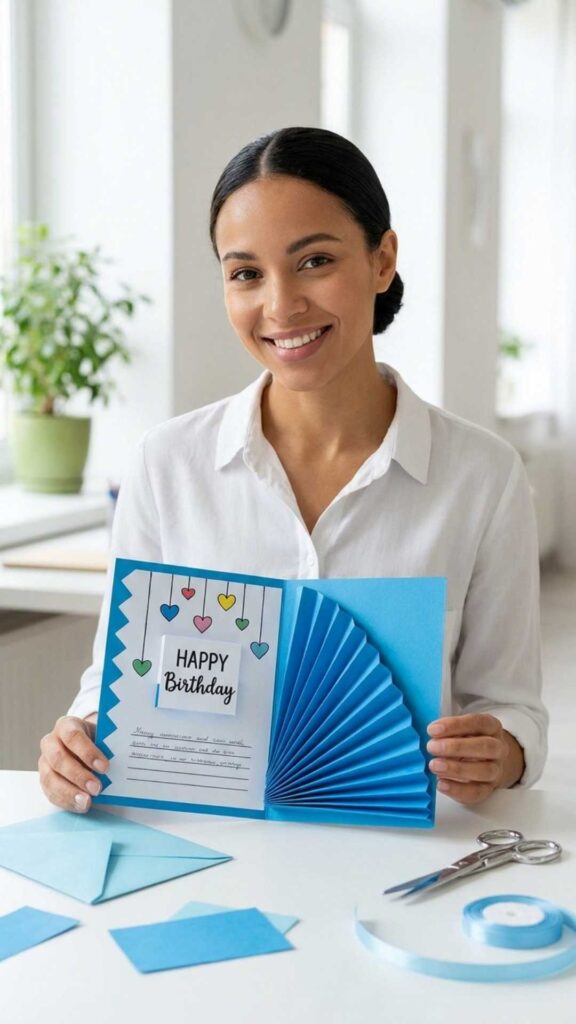
The front is blue polka-dot paper with two white hearts that read ‘Happy’ and ‘Birthday’. Inside, accordion-pleated blue fans frame the spread, colorful hearts hang from thin lines, and a ‘HAPPY Birthday’ sign pops up above handwritten notes. Shrishti : The Craft Lover makes it from colored paper, glue, sketch pens and satin ribbon, so it suits a party-loving kid who likes bright blue.
Keep the accordion pleats even
Mark the pleat lines with a pencil and ruler before folding so every fan section is the same width. Even pleats let the fans open and close smoothly with the card. Press each fold firmly with your fingernail.
Tie the card closed with ribbon
The materials include satin ribbon, which works well as a closure. Tie a bow around the closed card so the pop-up stays a surprise until the child opens it. Pick a ribbon color that matches the hanging hearts.
🎉 Supplies for the DIY Blue Accordion Pop-Up Heart Card
Creator Credit: Shrishti : The Craft Lover
5. DIY Pink Heart Gatefold Birthday Card
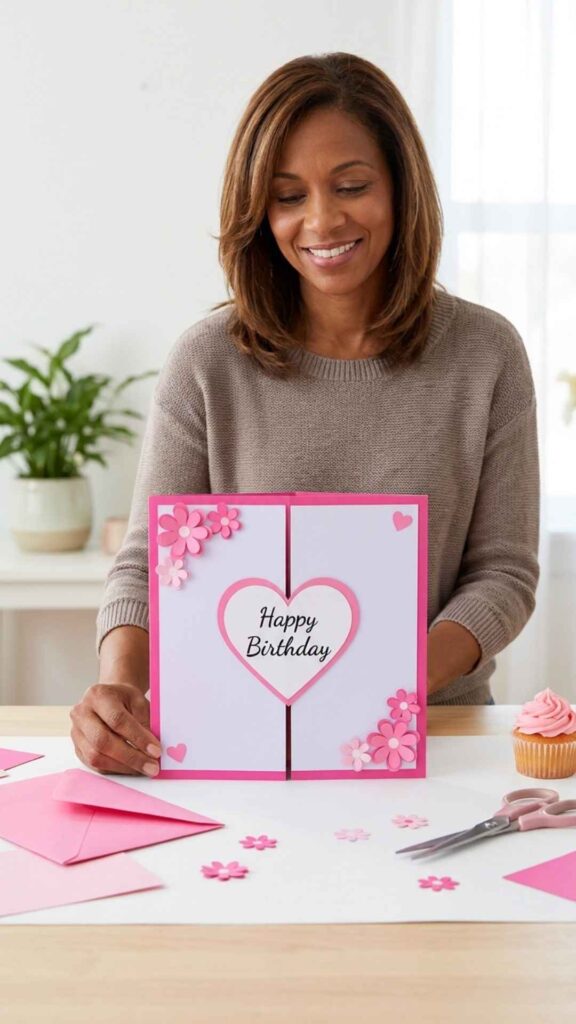
Two front panels with pink edges meet at a center heart frame that shows ‘Happy Birthday’ in script. Pink paper flowers and small hearts sit in opposite corners. Gifts with Love’s tutorial keeps the materials simple, which makes it a good first project for a young crafter to make for a friend.
Cut the heart frame through both panels
Line up the two front panels and cut the heart frame so each side holds half of it. The heart only looks whole when the panels line up. Test-fit before gluing the pink outline in place.
Let kids add the flowers
Once an adult has cut the frame, children can glue on the pink flowers and hearts themselves. Placing the embellishments is an easy job for them. Use a glue stick so nothing soaks through the white paper.
🎉 Supplies for the DIY Pink Heart Gatefold Birthday Card
Creator Credit: 💝 Gifts with Love
6. DIY Pink Teddy Bear Shape Card
This card is a teddy bear built from paper circles and hearts. It has a pink face, round ears, a red bow tie and heart-shaped paws on a white belly that carries the birthday greeting. Sumi’s Creation gives exact sizes, an 11.5 cm circle for the face and 6 cm circles for the ears, so the bear comes out in proportion, and the cuddly shape suits younger kids.
Trace circles with household objects
Use the stated sizes, an 11.5 cm face and 6 cm ears, and trace lids or cups that match. Drawing freehand circles is the hardest part for beginners. Cut slightly outside the line, then trim.
Write the message on the belly
The white belly holds the birthday greeting, so write it before you glue on the arms and paws. Add the child’s name in large letters. Mail the card in a padded envelope so the ears don’t bend.
🎉 Supplies for the DIY Pink Teddy Bear Shape Card
Creator Credit: Sumi’s Creation
7. DIY Pink Fan Fold Pop-Up Card
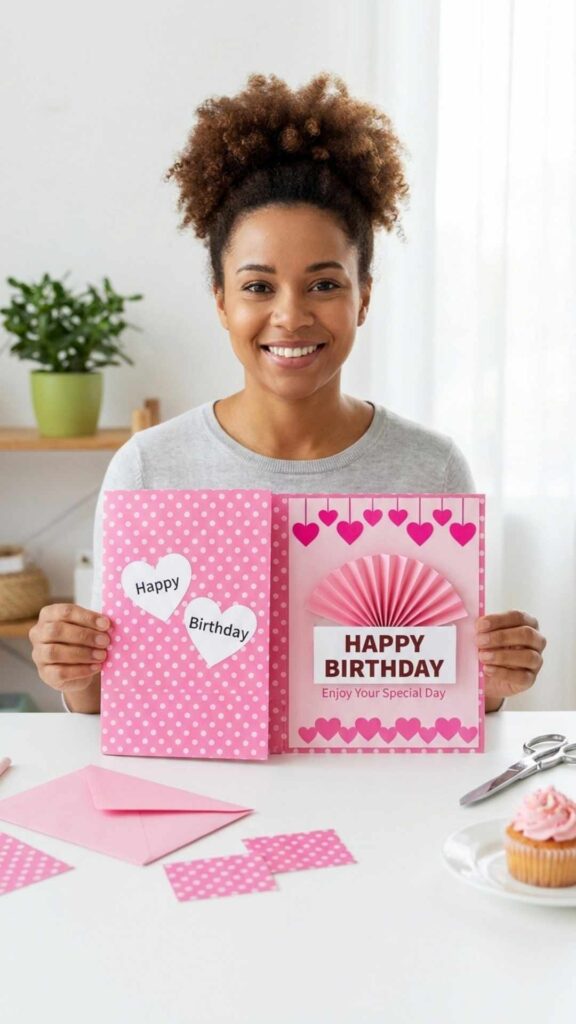
The pink polka-dot cover carries two white hearts with ‘Happy’ and ‘Birthday’. Inside, pink accordion fans line the edges, a row of pink hearts hangs from the top, and a ‘HAPPY BIRTHDAY’ sign pops forward over the words ‘Enjoy Your Special Day’. Crafts And Kutir’s design is all pink and white, a good choice for a child whose favorite color is pink.
Glue the fans after the pop-up
Attach the center pop-up sign first and check that the card closes flat. Then glue the accordion fans along the sides. Doing the fans last makes it easier to line everything up.
Mix heart sizes for depth
Cut the hanging hearts in two or three sizes and hang them at different lengths. The row looks livelier than identical hearts in a straight line. Write the guest of honor’s initials on one heart.
🎉 Supplies for the DIY Pink Fan Fold Pop-Up Card
Creator Credit: Crafts And Kutir
8. DIY White Paper Pop-Up Cake Card
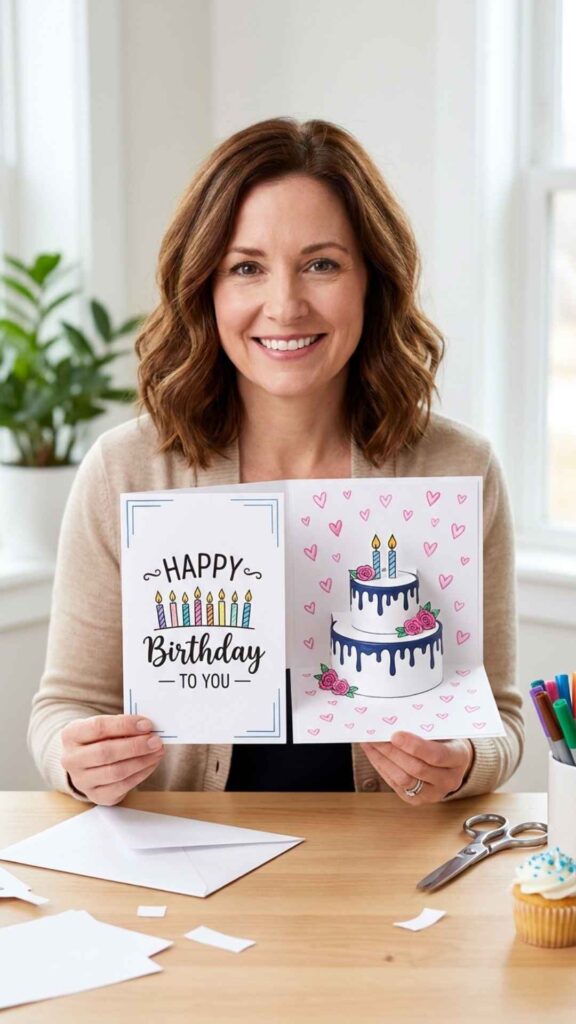
All you need for this one is a sheet of white A4 paper, a pencil, scissors, colors and glue. The front says ‘HAPPY Birthday TO YOU’ with small drawn candles, and inside a two-tier white cake with blue and pink drip trim and two candles pops up over tiny pink hearts. The Craft Studio by Kiran keeps the supply list short, so kids can make it with what’s already at home.
Color before you cut the pop-up
Draw and color the cake’s drip trim and candles while the paper is still flat. Coloring after the pop-up is cut is awkward, and the paper can crease. Markers give brighter color on plain white paper than crayons.
Doodle tiny hearts as confetti
Fill the background with small hearts or dots to make it look like confetti. Kids can do this part on their own while an adult cuts the pop-up slits. Leave space under the cake for a short message.
🎉 Supplies for the DIY White Paper Pop-Up Cake Card
Creator Credit: The Craft Studio by Kiran
9. DIY Watercolor Cherry Cupcake Card
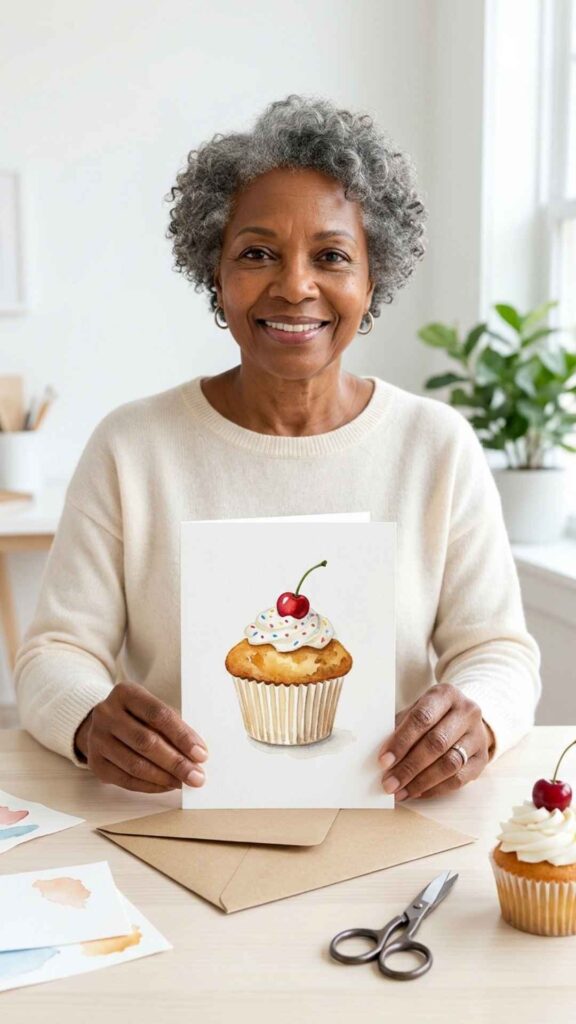
A single watercolor cupcake fills the front, with a golden top, white frosting dotted with sprinkles, a red cherry and a striped paper liner. Prema Watercolor walks through drawing the cupcake and then painting it step by step, and the tutorial notes it is easy enough for beginners and kids. One big, simple subject makes a good first painted card.
Sketch lightly before painting
Draw the cupcake in light pencil and erase most of the lines before you paint. Dark graphite shows through pale watercolor washes. Leave the frosting as bare white paper rather than painting it white.
Add the cherry last
Paint the red cherry once the frosting area is fully dry so the red doesn’t bleed into it. Leave a tiny white dot on the cherry for shine. Write the greeting below the liner after everything has dried.
🎉 Supplies for the DIY Watercolor Cherry Cupcake Card
Creator Credit: Prema Watercolor
10. DIY Watercolor Balloon and Candle Cards
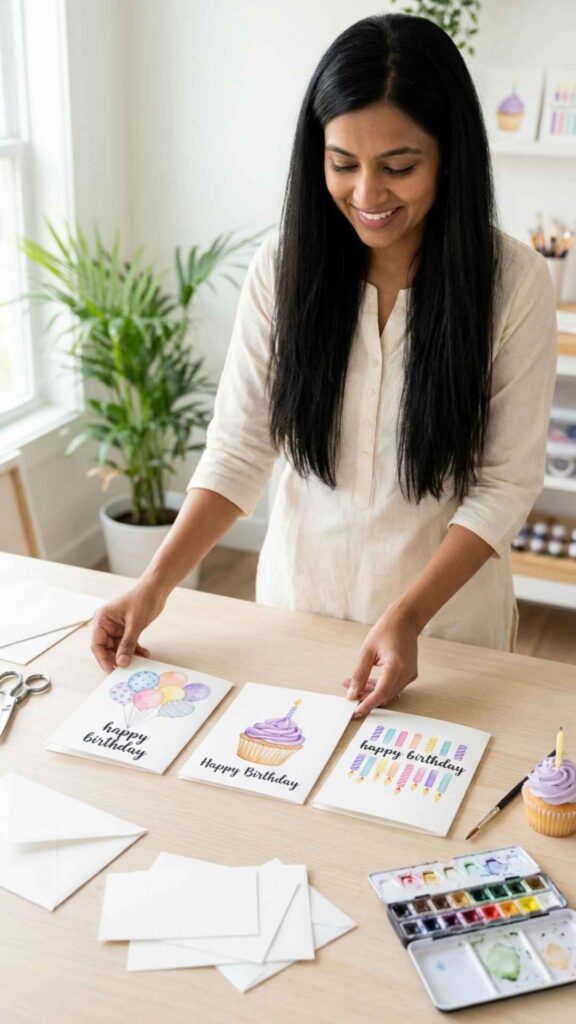
This tutorial teaches three cards: a bunch of patterned pastel balloons, a purple-frosted cupcake with a candle, and a row of colorful candles, each lettered ‘happy birthday’. artby_Shagun uses 300gsm watercolor paper, flat and round brushes and a black pen for details, and pitches it at all skill levels. You can make a few at once and keep them ready for upcoming class parties.
Batch the three designs together
Paint the base washes for all three cards in one session. While one dries, work on the next. Add pen details and lettering once every card is fully dry.
Outline with black pen for definition
A black pen, as used in the tutorial, outlines balloons, frosting and candles and covers soft edges. Wait until the paint is completely dry, or the ink will feather. Kids can add dots and patterns to the balloons with the same pen.
🎉 Supplies for the DIY Watercolor Balloon and Candle Cards
Creator Credit: artby_Shagun
11. DIY Heart Window Flap Birthday Card
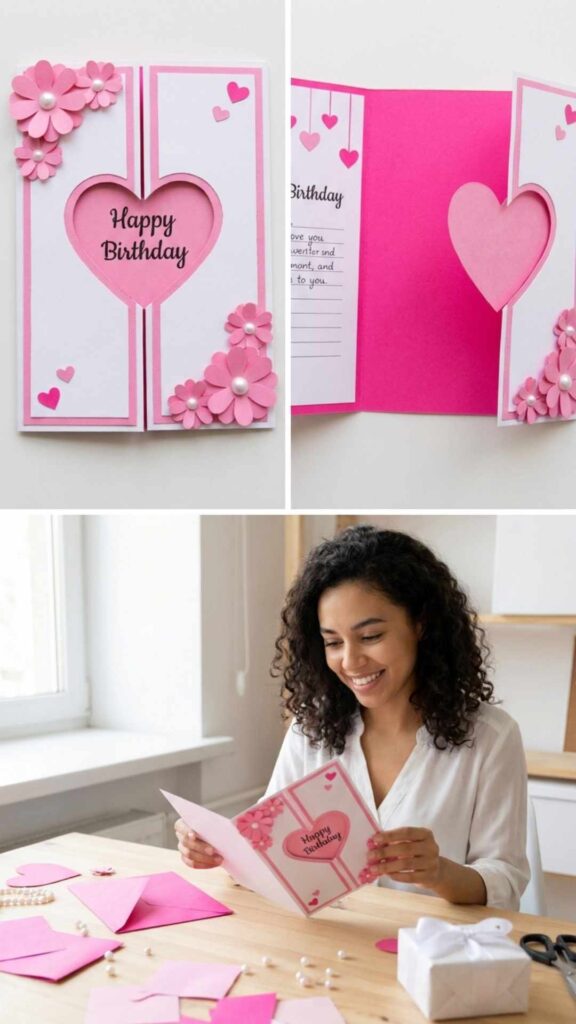
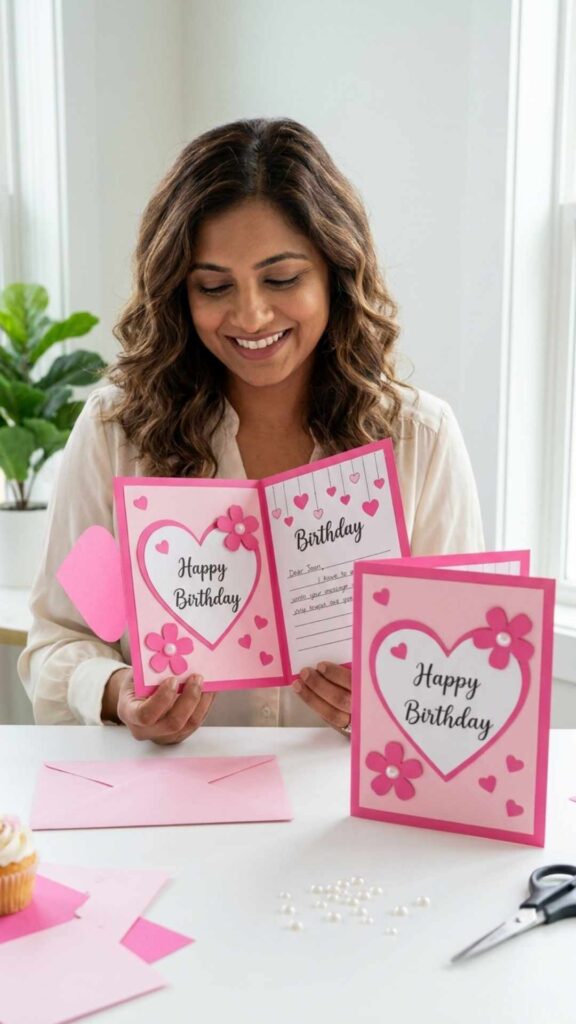
The front flaps meet at a pink heart window framing ‘Happy Birthday’, with pink flowers that have pearl centers and small hearts in the corners. Open the flaps to find a bright hot pink inside with hanging hearts and room for a handwritten note. Shrishti : The Craft Lover’s version adds pearl-centered flowers and a hidden message panel, a little extra for a sibling or best friend.
Leave a note panel inside
Glue a white panel to the hot pink inside before decorating so you have a clean place to write. Pen on dark pink paper is hard to read. Draw light pencil lines first to keep the handwriting straight.
Press pearls on last
Add the pearl centers to the flowers after all the gluing is done. They are the easiest piece to knock off. Self-adhesive pearls stick right away, with no drying time.
🎉 Supplies for the DIY Heart Window Flap Birthday Card
Creator Credit: Shrishti : The Craft Lover
12. DIY Hand-Drawn Party Doodle Card
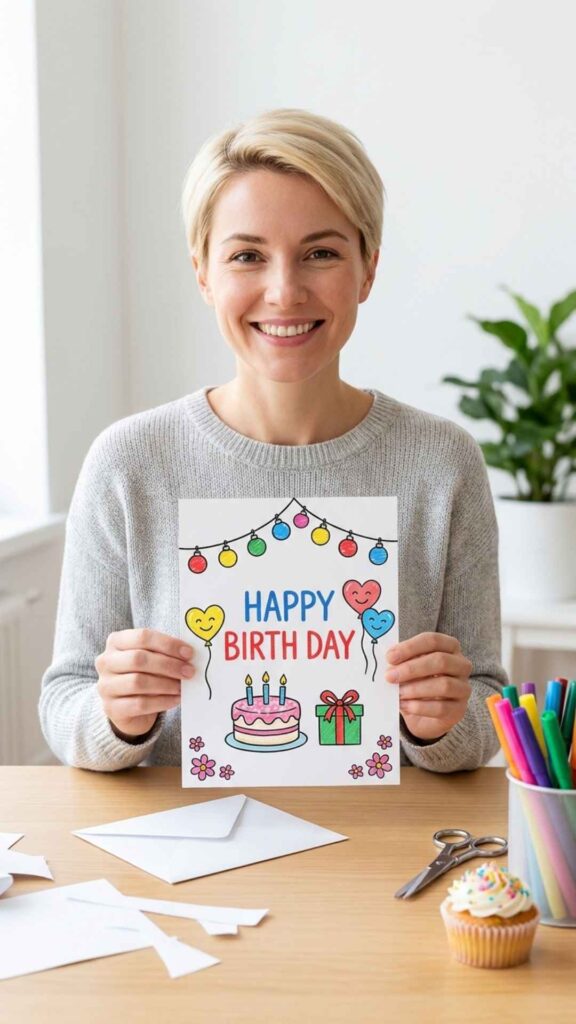
The whole front is drawn by hand: a string of colorful hanging lights along the top, ‘HAPPY BIRTH DAY’ in blue and red, a frosted cake with candles, a wrapped gift, heart balloons and small pink flowers. MNSB inward shows it step by step using only paper and drawing tools. Every element is a simple shape that children can copy, so it’s a good card for kids to draw themselves.
Pencil the layout before inking
Lightly sketch where the lights, lettering, cake, gift and balloons go before using markers. That keeps the lettering centered and stops the bottom from getting crowded. Erase the pencil once the ink is dry.
Color-match balloons to favorite colors
Ask the birthday kid’s favorite colors and use them on the balloons and lights. It’s a small touch, but it makes the card feel made just for them. Draw a smiley face on a balloon, like the one shown.
🎉 Supplies for the DIY Hand-Drawn Party Doodle Card
Creator Credit: MNSB inward
13. DIY Eight Easy White Paper Cards
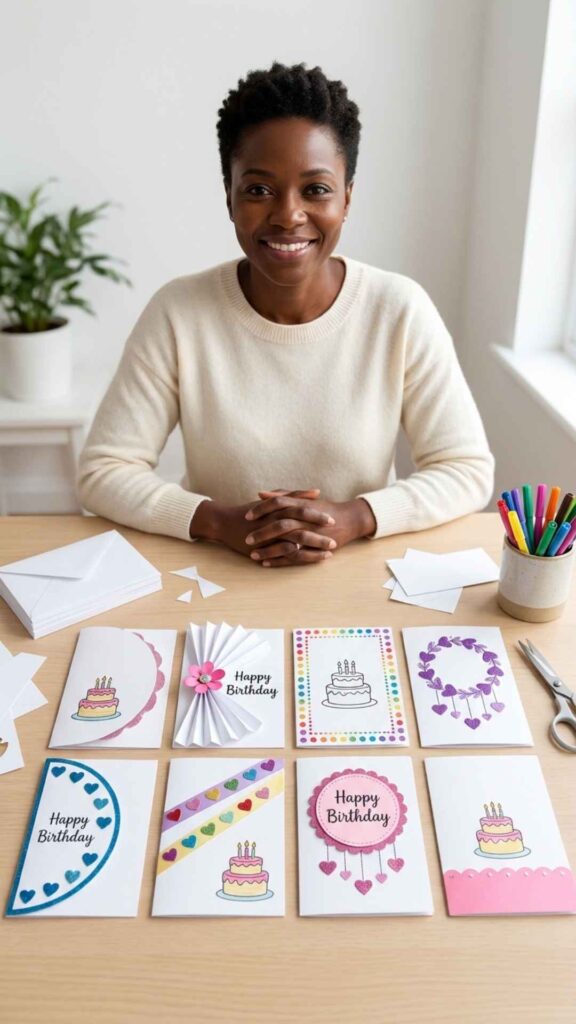
This tutorial covers eight different cards made from white paper, scissors and sketch pens. The designs include rainbow borders, a fan-folded front with a flower, hanging hearts, layered cakes, curved cut-out edges and a scalloped bottom border. Shilpa Drawing & Craft gives you plenty to choose from, so a group of kids can each pick a different card at a party table or craft afternoon.
Set up a card-making station
With eight designs to pick from, lay out white paper, scissors and sketch pens and let each child choose a design. An adult can handle the curved and scalloped cuts. Kids can do the drawing and coloring.
Start with the drawn-only designs
Some designs are only drawing, while others need cutting or fan folding. Start beginners on a drawing-only one such as the hanging hearts or rainbow border. Move on to the folded fan design once they’re comfortable.
🎉 Supplies for the DIY Eight Easy White Paper Cards
Creator Credit: Shilpa Drawing & Craft
14. DIY Hanging Hearts Circle Doodle Card
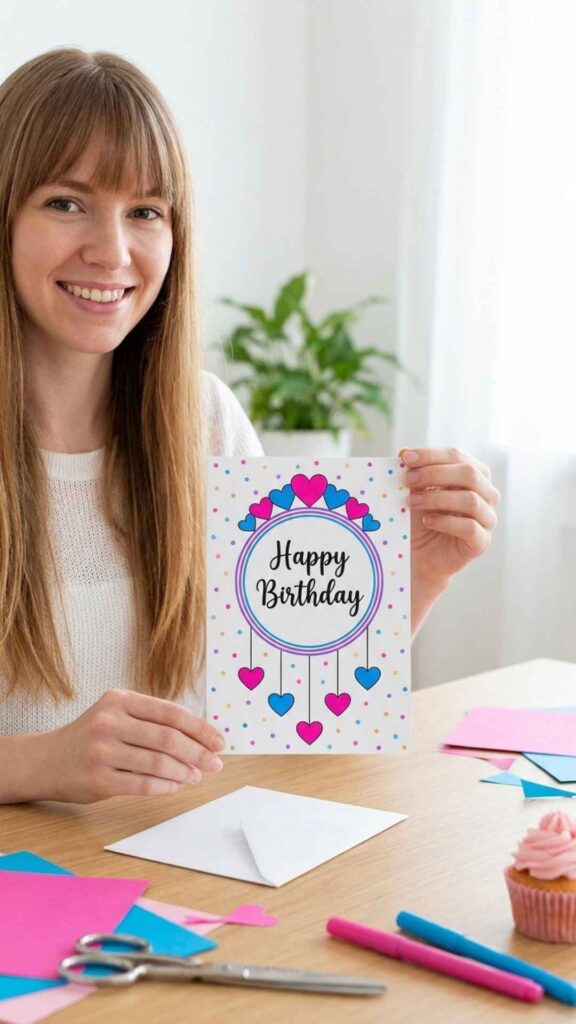
A circle with ‘Happy Birthday’ in script sits in the middle of a crown of pink and blue hearts, with more hearts dangling below on thin strings. The white background is sprinkled with colorful confetti dots. Shilpa Drawing & Craft keeps it to drawing only, which makes it a quick card a child can finish in one sitting.
Trace a circle for the center
Trace around a cup or roll of tape so the center ring comes out round. Draw two rings close together for the double-line look. Then add the hearts around the outer edge.
Alternate two heart colors
Alternate pink and blue hearts around the circle and down the strings, as shown. The pattern looks tidy even if the hearts are slightly different sizes. Fill leftover white space with small confetti dots.
🎉 Supplies for the DIY Hanging Hearts Circle Doodle Card
Creator Credit: Shilpa Drawing & Craft
15. DIY 3D Paper Flower Pop-Up Card
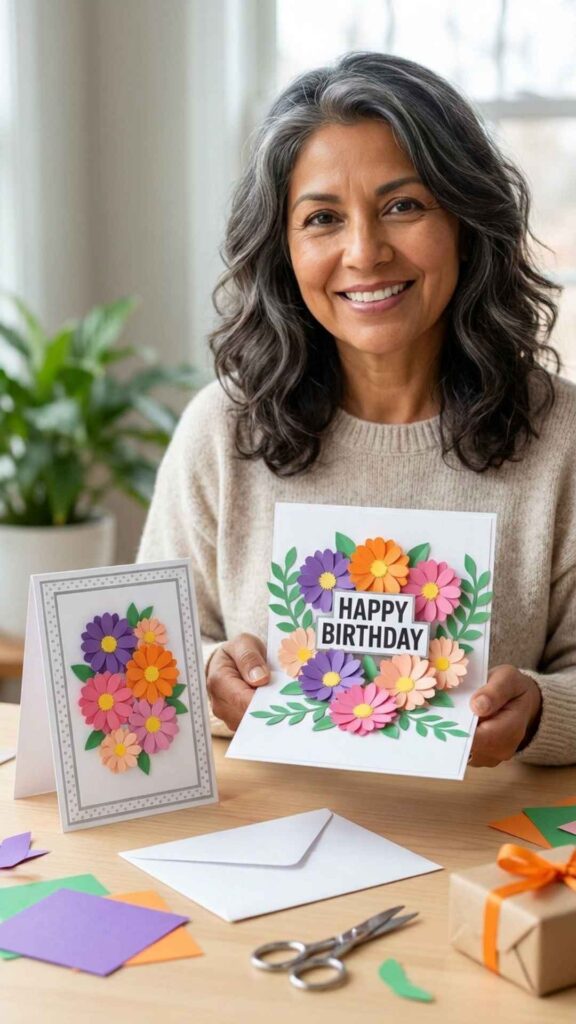
When opened, this card shows a ‘HAPPY BIRTHDAY’ sign surrounded by layered paper flowers in purple, orange and pink, with green leaves around them. The white cover has a decorative border and a framed flower panel on the front. Own World Art & Craft makes it as a 3D card, a colorful option for a child who loves flowers.
Curl the petals for depth
Gently curl each petal around a pencil before gluing the flowers in place. Curled petals look fuller and more three-dimensional than flat cutouts. Glue only the center of each flower so the petals can lift.
Check the fold clearance
Before gluing the flowers down, close the card to see where they press against the cover. Move any flower that sticks out past the edge. A box or padded envelope protects the flowers in the mail.
🎉 Supplies for the DIY 3D Paper Flower Pop-Up Card
Creator Credit: Own World Art & Craft
16. DIY Pastel Blossom Pop-Up Card
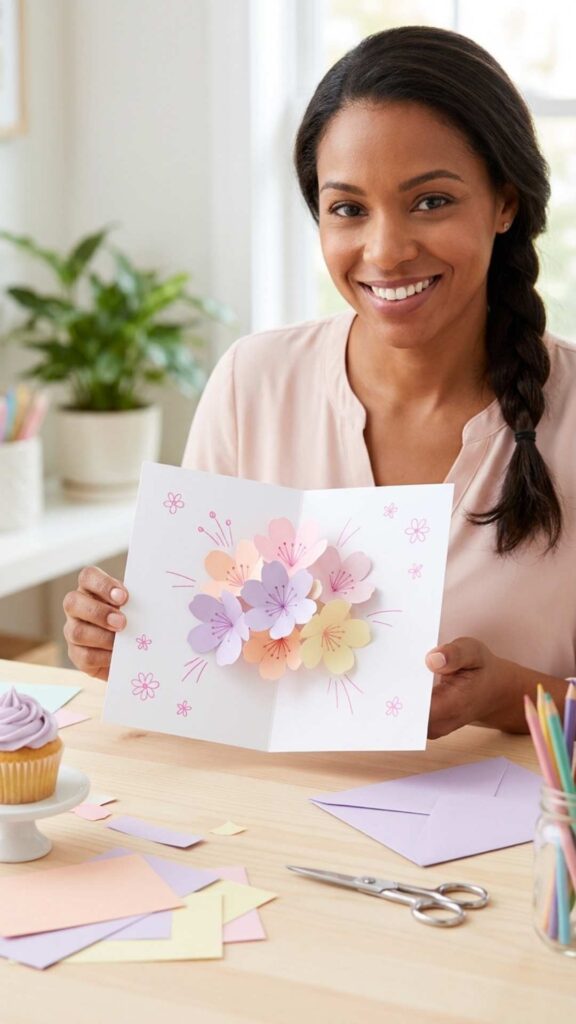
A cluster of pastel flowers in pink, lilac, peach and pale yellow pops up from the center fold of a white card decorated with small pink doodles. Artbygriii describes it as easy and good for beginners and school projects, and the card can be adapted for birthdays. The soft colors make it a gentler alternative to bright party designs.
Use one template for all flowers
Cut one flower template and trace it onto each pastel sheet so the blooms are the same size. They’ll nest neatly when the card closes. Fold each flower in half before attaching it to the center.
Doodle around the blooms
Add small dots, swirls or tiny flowers around the pop-up with a pink pen to fill the white space, as shown. Kids can take on this part. Leave a clear space for the birthday message.
🎉 Supplies for the DIY Pastel Blossom Pop-Up Card
Creator Credit: Artbygriii
17. DIY Pull-Tab Surprise Birthday Card
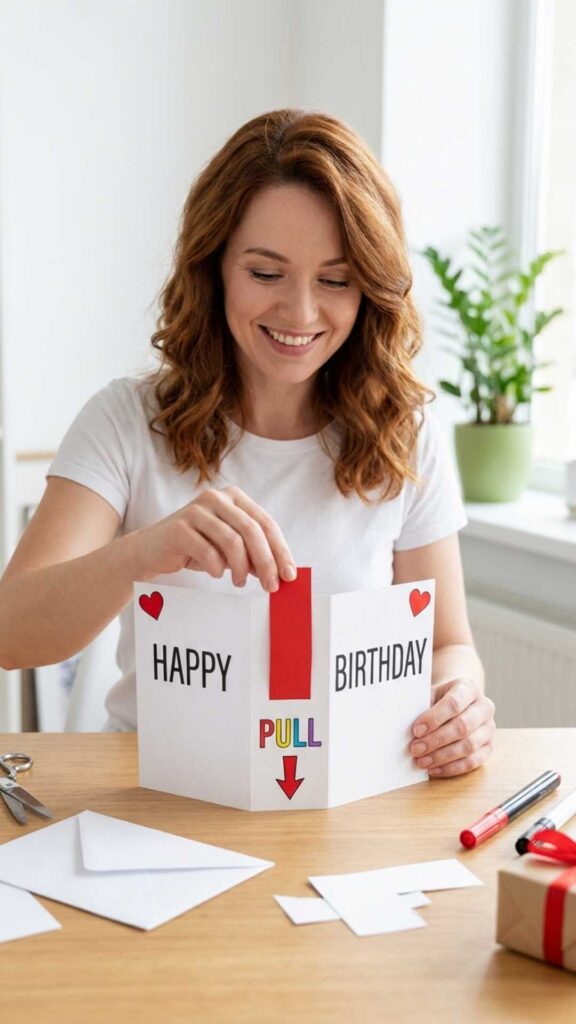
This is a folded white paper card with two triangle flaps that say ‘HAPPY’ and ‘BIRTHDAY’, red hearts in the corners, and a ‘PULL’ label with a red arrow pointing to a tab at the bottom. simple Art and crafts made it specifically as an easy card for kids, and pulling the tab to reveal the inside is the fun part.
Practice the fold with scrap paper
Fold a scrap sheet first to see how the triangle flaps and pull tab work together. Once a child has the folds down, the final card goes quickly. Crisp creases make the pull open smoothly.
Hide a message under the pull
Write the biggest surprise in the part revealed by the pull, such as the child’s name, age or a party invitation. Use bright marker colors for the ‘PULL’ label so the recipient knows where to start.
🎉 Supplies for the DIY Pull-Tab Surprise Birthday Card
Creator Credit: simple Art and crafts
18. DIY Machine-Cut Floral Wreath Card
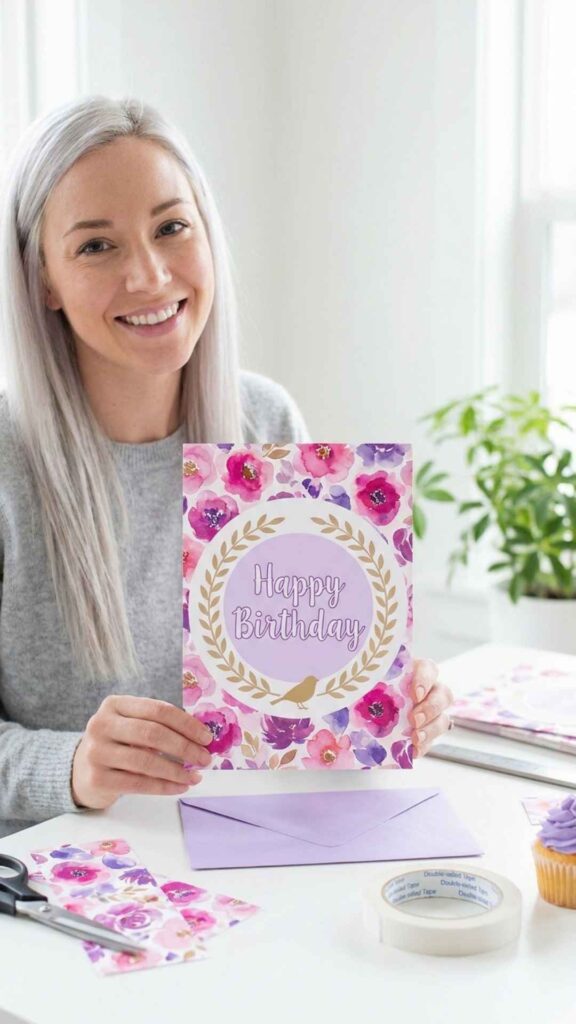
The front uses pink and purple floral patterned paper, layered with a lavender circle reading ‘Happy Birthday’ in script inside a gold leafy wreath. DIY Alex shows how to find a premade card project in Cricut Access, cut the pieces and assemble them with double-sided tape, tacky glue and foam squares. It’s a beginner Cricut project for families who want to make several matching cards.
Raise the center with foam squares
Mount the lavender greeting circle on foam squares, as the tutorial suggests, so it sits above the floral background. The shadow underneath adds depth. Use flat double-sided tape for the larger background layers.
Cut extras for party invites
Once the file is set up, cut a few extra sets of pieces in the same colors. Use them as matching thank-you notes or invitations for the party. Keep the leftover wreath pieces in an envelope for later.
🎉 Supplies for the DIY Machine-Cut Floral Wreath Card
Creator Credit: DIY Alex
19. DIY Watercolor Rainbow Candles Card
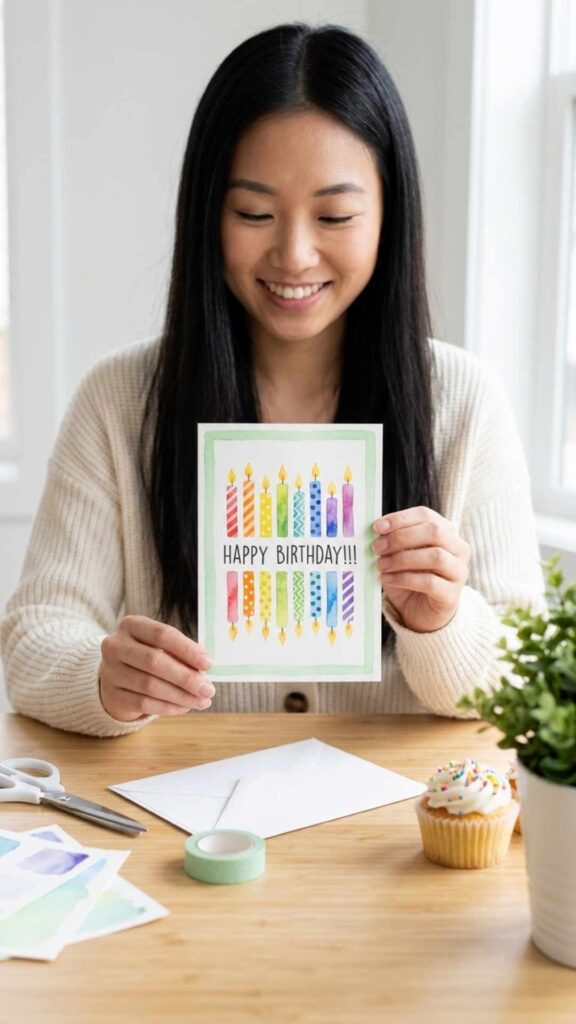
A row of tall birthday candles is painted in rainbow colors, each with its own stripes, dots or zigzags and a small yellow flame, with ‘HAPPY BIRTHDAY!!!’ lettered across the top. The Happy Ever Crafter uses a watercolor card, watercolor paint, brushes and washi tape, and notes you can make a bunch at once. A row of candles is easy for kids to paint and fun to count.
Mask the border with washi tape
Tape the card’s edges with washi tape before painting so you get a clean white border when you peel it off. Wait until the paint is fully dry before removing the tape. The tutorial warns against rushing this step.
Paint one candle per year
Match the number of candles to the child’s new age. Give each candle a different pattern, such as stripes, dots or checks, to keep the row lively. Add the lettering last with a fine pen.
🎉 Supplies for the DIY Watercolor Rainbow Candles Card
Creator Credit: The Happy Ever Crafter
20. DIY Party Cat Pop-Up Birthday Card
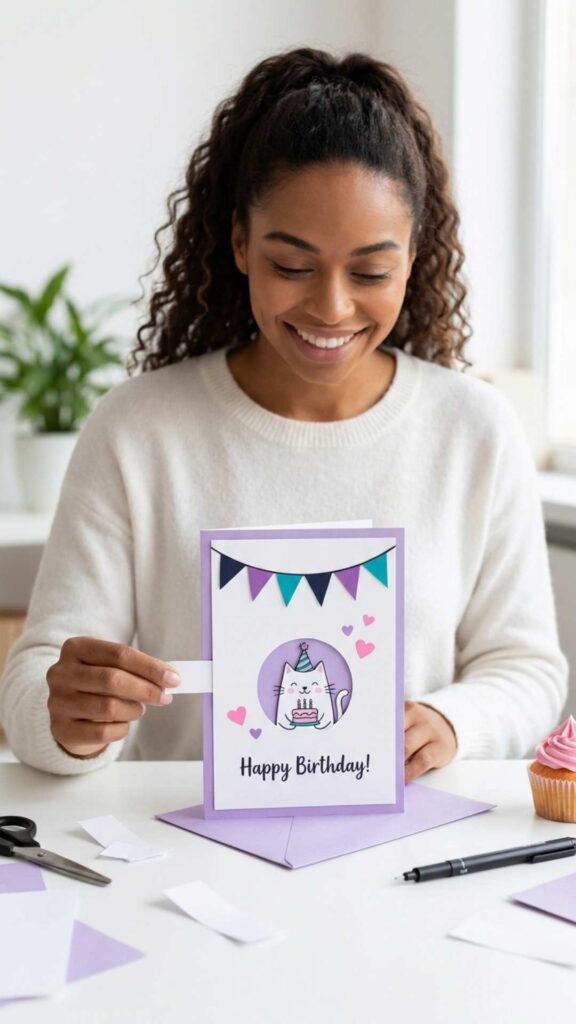
The white card has a colorful bunting banner across the top, scattered pink hearts and ‘Happy Birthday!’ in handwriting. A round window shows a cat in a party hat holding a slice of cake, and a white tab on the side is part of the open-to-see pop-up movement. Maison ZiZou’s playful design is a natural fit for animal-loving kids.
Test the pop-up movement early
Assemble the moving part and the cat window before decorating the rest of the card. If the cat doesn’t pop out smoothly, it’s easier to adjust before the bunting and hearts go on. Trim the tab edges so they don’t catch.
Swap the cat for their favorite animal
Change the cat to the birthday child’s favorite animal or pet. Draw it with a party hat and cake to keep the party theme. Color the bunting flags in their favorite colors.
🎉 Supplies for the DIY Party Cat Pop-Up Birthday Card
Creator Credit: Maison ZiZou
Which Card Style Fits Your Celebration?
| Style direction | Projects to compare | Main feature | Check before choosing |
|---|---|---|---|
| Pop-up surprise | 1, 8, 20 | A cake or character appears when the card opens | Needs careful cutting and a test fold before decorating |
| Accordion fan pop-up | 4, 7 | Pleated side fans, hanging hearts and a pop-up sign | Takes the most folding time; plan an extra hour |
| Shaped and fold-out novelty | 3, 6, 17 | The card’s shape or pull action is the fun part | Non-rectangular shapes need a larger or padded envelope |
| Heart window gatefold | 5, 11 | Two front panels meet at a heart frame | Both panels must line up exactly before gluing |
| Watercolor painted | 2, 9, 10, 19 | One painted subject such as a bee, cupcake or candles | Needs watercolor paper and drying time between layers |
| Drawing-only doodle | 12, 13, 14 | Markers and pens on white paper, no cutting needed | Pencil the layout first so lettering stays centered |
Conclusion
For a big reaction, try the DIY Pop-Up Pink Layer Cake Card or the DIY Party Cat Pop-Up Birthday Card, which both have a surprise built in. For younger kids making cards themselves, the DIY Pull-Tab Surprise Birthday Card and the DIY Hanging Hearts Circle Doodle Card need little more than paper and markers. Both can be finished in one sitting.
If you like to paint, the DIY Watercolor Hap-Bee Birthday Card and the DIY Watercolor Rainbow Candles Card are cards a child will want to keep. Whichever you choose, watch the creator’s full video once before you start, gather the supplies listed above, and save a little space inside for a message the birthday kid will remember.
Frequently Asked Questions
What is the easiest birthday card for a kid to make?
A drawing-only card or a simple folded pull card is the easiest place to start. All you need is white paper, markers and a few folds, with no tricky cutting. Kids can usually finish one in under half an hour.
What age can kids start making their own birthday cards?
Preschoolers can decorate a card with stickers, glue sticks and markers once an adult has cut and folded the base. By early elementary school, most kids can handle simple folds and drawn designs on their own. Pop-ups and accordion folds work best with adult help until around age eight or nine.
What paper is best for handmade birthday cards?
Cardstock is the best all-around choice because it holds folds and stands up when opened. Plain printer paper works for drawn and folded designs. For painted cards, use watercolor paper so the card does not buckle when wet.
How do you make a simple pop-up birthday card?
Fold a sheet in half, cut two parallel slits from the fold, and push the section between them inward to make a step. Glue your cake, sign or character to the front of that step. Then glue the inner card into a slightly larger outer cover so the slits stay hidden.